


✨ Brighten your drive, protect your pride! 🚗
Meguiar's Two Step Car Headlight Restoration Kit offers a professional-grade, easy-to-use solution to remove oxidation and yellowing from plastic headlights. With no drills required, the kit includes cleaning pads and a protective coating that restores clarity and provides up to 12 months of protection against re-oxidation. Ideal for enhancing nighttime visibility and vehicle aesthetics, this trusted kit delivers lasting results backed by over a century of Meguiar’s automotive care expertise.


| ASIN | B01M75GUJB |
| Best Sellers Rank | #2,525 in Automotive ( See Top 100 in Automotive ) #22 in Automotive Headlight Restoration Kits |
| Brand | Meguiar's |
| Customer Reviews | 4.4 4.4 out of 5 stars (11,410) |
| Date First Available | November 3, 2016 |
| Exterior | Polished |
| Is Discontinued By Manufacturer | No |
| Item Weight | 12.8 ounces |
| Item model number | Meguiar's - G2970 |
| Manufacturer | Meguiar's |
| Manufacturer Part Number | G2970 |
| Mirror Lighting Type | automotive-exterior-headlight-bulbs |
| Model | Meguiar's - G2970 |
| OEM Part Number | G2970 |
| Position | Front |
| Product Dimensions | 9.12 x 3.55 x 2.55 inches |
| Special Features | Not_Performance_Used |
D**N
Easy way to make my car headlights look new
Engaging with this kit made the cleaning process straightforward. i took my car on a road trip, and these headlights looked sharp after using the product. the cleaning solution and coating work well together to restore the clarity of the plastic and keep it protected from future oxidation. it's handy having everything in one pack to get the job done quickly at home. the headlights look noticeably clearer, which makes a difference for nighttime driving. overall, i’m glad i gave it a try and will keep it in my car kit for regular touch-ups 🚗✨.
P**L
Meguiar's headlight restoration kit exceeded my expectations
I recently used Meguiar's 
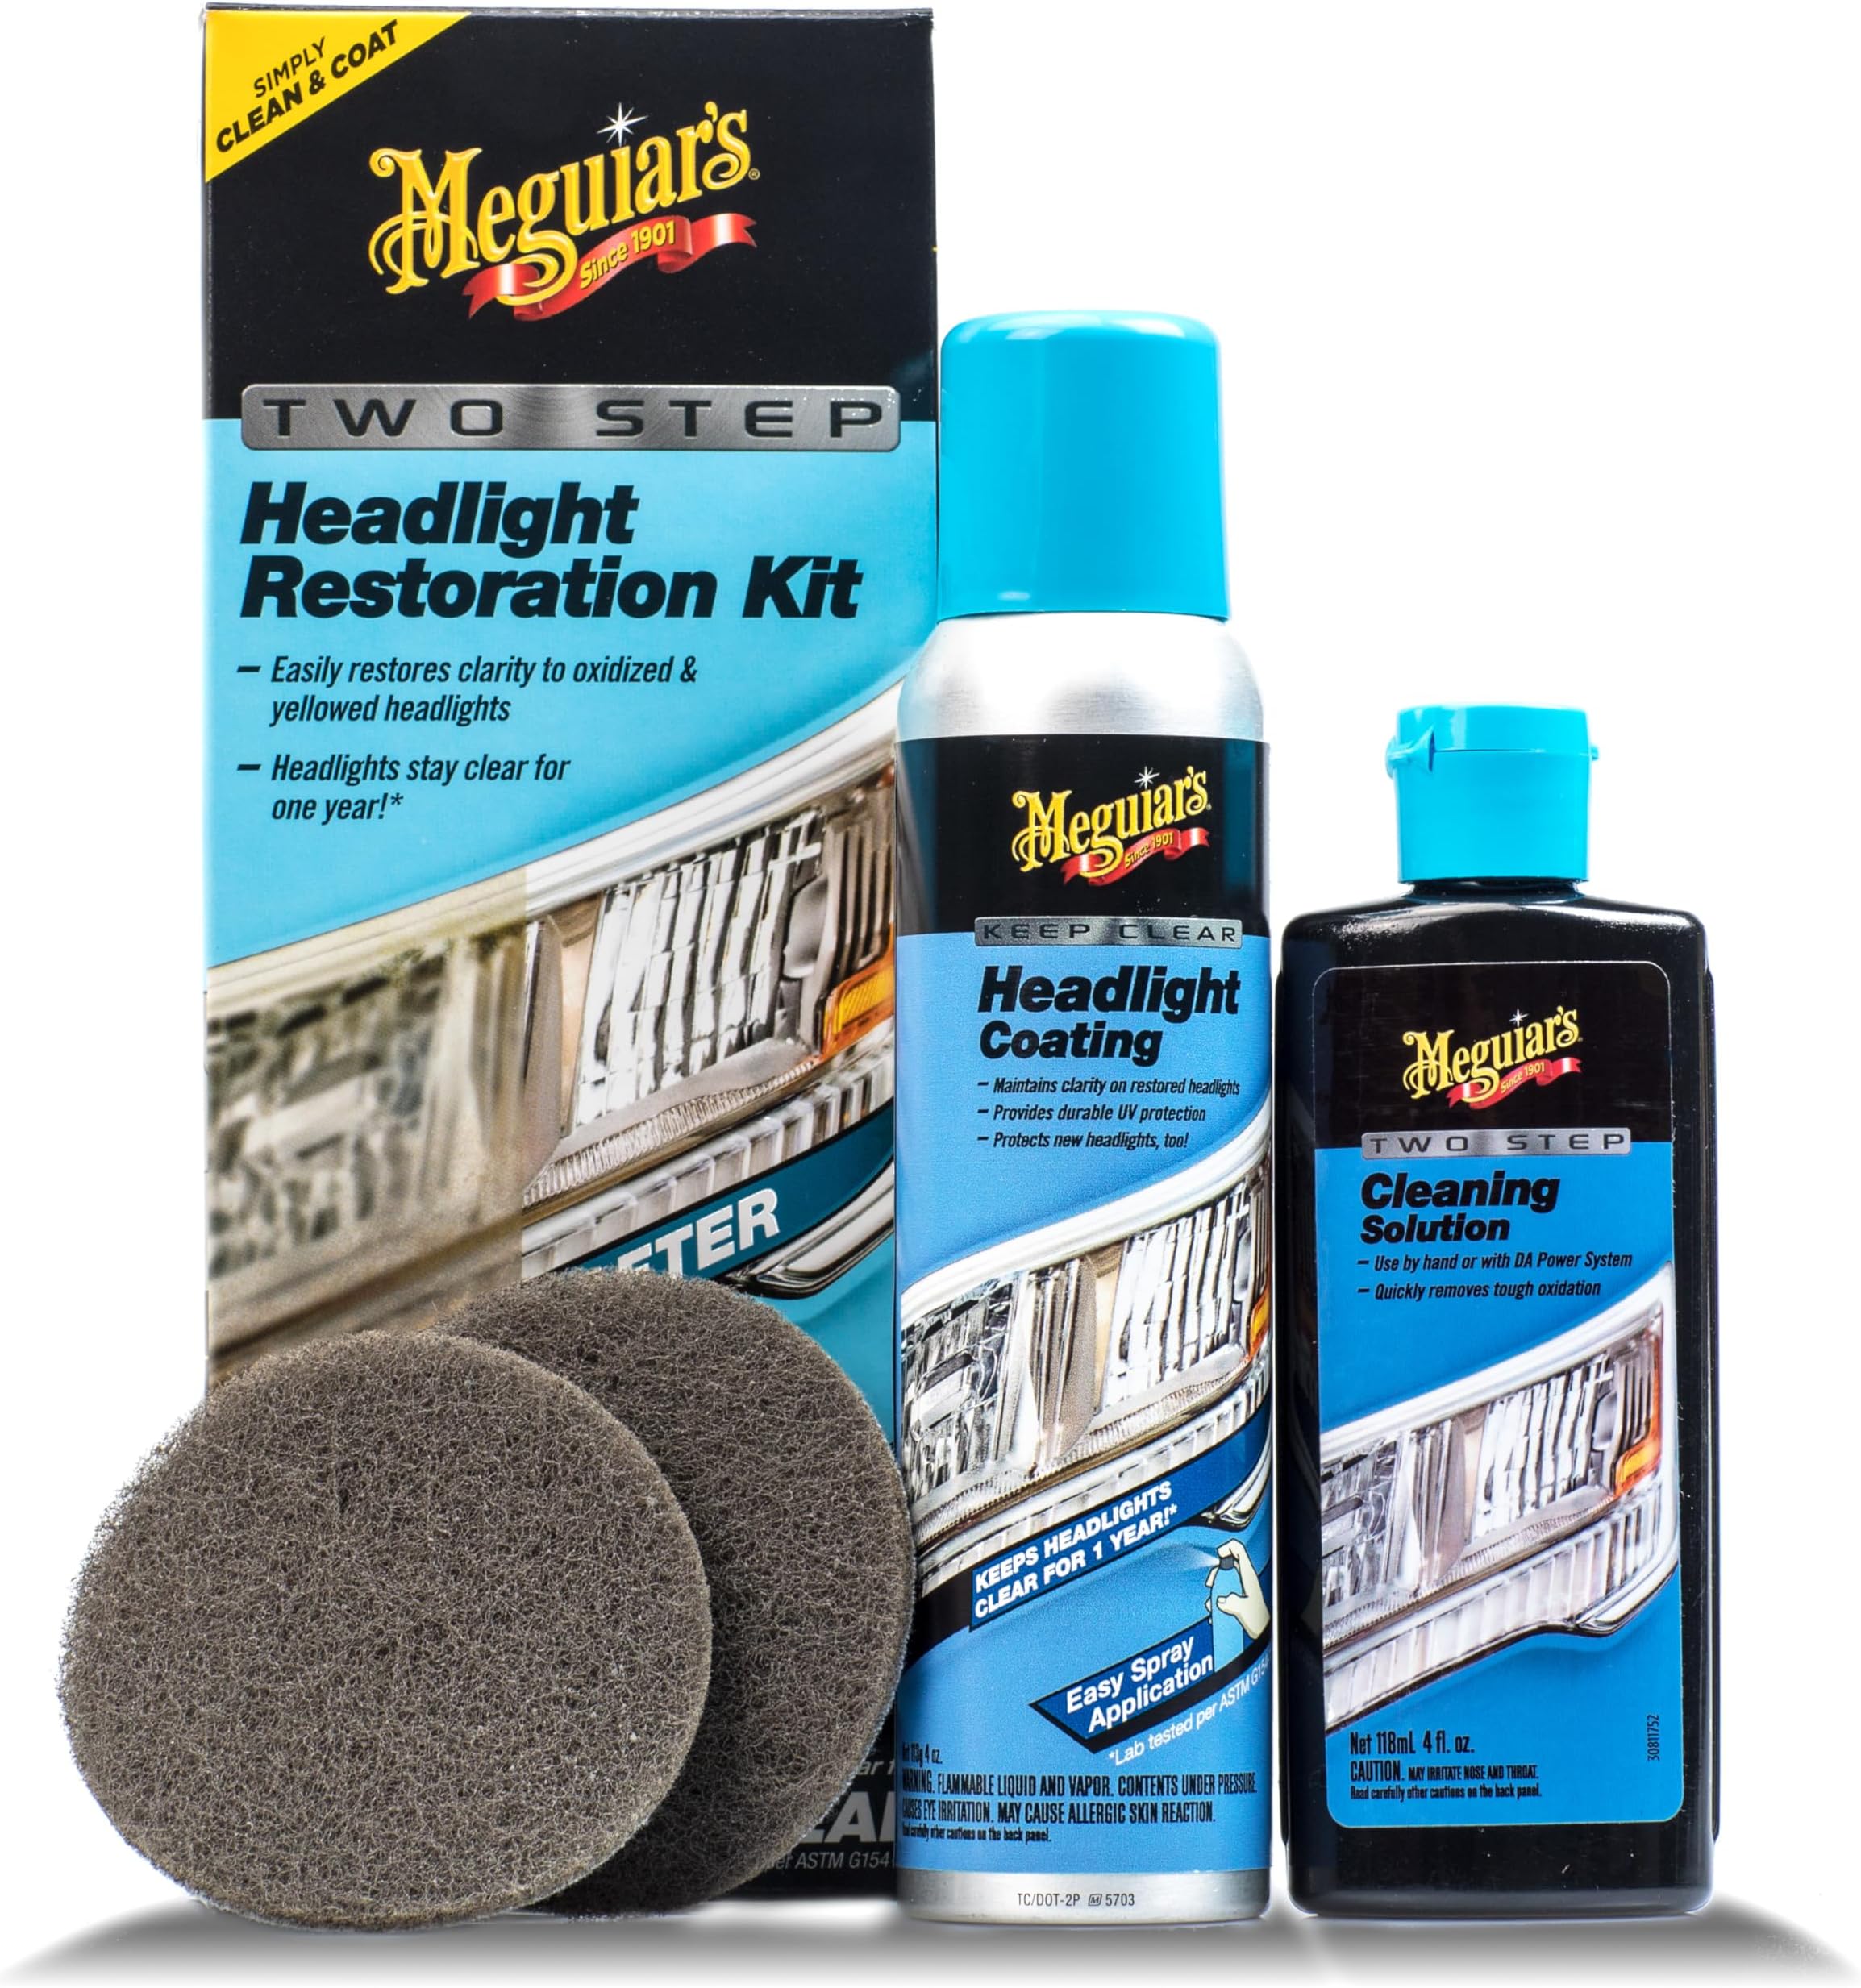
Two Step Headlight Restoration Kit on my car. The process was straightforward, and the results were fantastic. The headlights now look brand new, with a noticeable difference in clarity. The included coating provides extra protection against re-oxidation, which is a lifesaver for longevity. I used it over the weekend while someone was mowing the lawn outside, and I couldn't be happier with how it turned out. It definitely saved me a trip to the auto shop! Highly recommend this kit for anyone looking to spruce up their headlights without breaking the bank.
F**.
DIY'er
Good product easy to apply with good results when used as stated on user instructions.
M**Z
Easy way to brighten headlights
What's great about this kit is how it makes a noticeable difference. used it on my car headlights during a road trip, and they looked much clearer after just a few minutes. the cleaning solution works well, and i appreciated the included coating for added protection. no more cloudy lights for me 🚗✨. Definitely helps keep my headlights looking good longer.
D**H
Great buy!
This stuff was like magic restoring my headlights! It worked great and only took a couple minutes. Took my headlights from barely being able to see in them to almost crystal clear!
J**N
This will remove the factory UV protection. Don't use it unless your headlights really need it!
I naively bought this hoping to polish some light wear out of my otherwise clear headlights (3 year old Audi A5). But ultimately ended up worse off. If your headlights are cloudy, I assume this will greatly improve them. But it's trickier than I expected, and needs more thorough directions (not even their video is detailed enough). Lesson 1: If your headlights are still clear, all this will do is ruin the factory UV layer! They should really have a big warning about that. Lesson 2: It's all about how you spray. Too much or too little, and it will look cloudy. Lesson 3: Taping is not enough. This will overspray onto your paint if you don't use plastic to cover several feet around. You can remove the overspray with rubbing alcohol, but it isn't easy. Lesson 4: The scrubber will leave a lot of light scratches that are visible under bright light. Lesson 5: After treatment, the headlights look clear straight on, but slightly filmy from the side. Most people won't notice, but it's not as good as new. (but maybe I still haven't perfected my spray technique) The whole story: After my first attempt, the left headlight looked clear from the front, but had a slight film when viewed from the side. The right headlight was another story. It was so filmy, it looked like I'd ruined it. With despair filling my stomach, I called tech support. Kudos to them for instantly answering. They said to do it over again. This time, during the second step, I applied slightly more spray on the first pass. It looked perfect even from the side! But after the second spray, it had that slight film again. I've settled for that. I guess I'll get more chances to practice, since I'll have to do this every year from now on. That's the price of ruining the factory UV protection. :( If I get up the energy, I might try a sanding kit, and applying a thin plastic UV film, which I've now learned is the best and longest lasting solution (5 years of protection). UPDATE: I have now redone the right headlight 4 times, and have yet to achieve a factory clear finish. It remains slightly filmy when viewed from the side. It's acceptable but not perfect. I'm calling it quits. I will be moving on to a sanding based solution.
S**B
Best part is the finishing spray. Good results. Hybrid technique described here.
This worked for me, but I combined items in two kits to get a good result. Neither were expensive. After reading way too many reviews, I decided to use a modified method. I'll describe this hybrid approach below. The headlight lenses on my 2008 Honda CR-V were not too bad, about half was moderately oxidized. I double masked the area so that I didn't damage the adjacent painted or plastic parts. First, 3/4 inch tape to get close, then 1-1/2 inch over it to protect it and give a bigger area for final masking (spraying). Step 1: I wet sanded the light first, starting with 400 wet sandpaper that I had, then moved to the 600 and 1500 from the kit, using some 1000 that I had. I think you really only need to use three grits, and if the lights are only lightly oxidized, start with 600. Remember to always sand with a circular motion. Wearing rubber gloves make all this easier. Keep splashing water on it to remove the residue before continuing to sand. As others have noted, you'll see the yellow residue of the oxidation running down as you sand. When the residue turns to white, then you have removed all the oxidation in that area. Some areas will need more sanding than others. Be careful next to the masked areas. When done, rinse it and wipe dry. It should look like a nice even frosting on the surface. Note: if the oxidation is really light, you may be able to get away with just using the cleaner, but the cleaner is only a light rubbing compound. You've got to remove the yellow oxidation. Step 2: I polished it with a foam drill attachment from another kit (Mother's 07251 NuLens), using the polishing compound from that kit. Perhaps I could have skipped this step and gone straight to the cleaner (try that next time). This changed the frosting to a haze. Maybe next time I'll try the drill attachment with the cleaner. You can also do it by hand. If you use something on a drill, use it on a low speed. Going too fast at the same spot (and I can tell you it doesn't take much) will melt the plastic and cause marks which are hard to sand out (I had to go back to step 1 in an area). I used a cordless drill on the low speed. (Note: I did not use sandpaper on the attachment with that other kit. I think that would have been too aggressive and left bad circular scratches. I did it by hand. It's some work, but you can more easily control how much you sand when doing it by hand.) Step 3: Use the cleaner with a soft cloth. Go over the whole area with a circular motion. Rub off any remaining residue. I splashed water on it again and dried it really well. The light should start to look clear, but not perfect, still a little hazy. Step 4: Add newspaper or plastic to the masking tape. The spray is not directed, it comes out in a wide pattern, and there is a lot of overspray. I wouldn't worry too much, but you'll want to protect a foot or two. It's actually better if there is a slight breeze, as it carries the overspray away from your car. Spray a nice even coat on the light, overlapping each pass. Not too much or you'll get drips. The spray is very fine and it goes on easily. You'll be amazed how the spray makes it shiny and clear. Let it dry 5 minutes and do it again. Let it dry 10 minutes and carefully remove the masking. You're done. I just did it today, so I can't yet tell you how long this lasts. If I'm lucky, I can update this in a year and report that it still looks great. Some kits contain polish only, and I don't see how it can get completely clear and last for a long while without this protective spray. There is plenty of spray here, enough to do this process a few times. Lots of cleaner too. Both headlights took me about 2 hours, including set up and clean up. If you can remove the whole headlight lens from your car, then do this and avoid all the masking. Just remember to tape the bulb openings and don't let water inside your lens. If I was ordering again, I would only buy this kit along with 400, 600, and 1000 wet sandpaper. Hope this helps!
L**R
Excelente producto. Lo probe en USA, y funciono muy bien!
M**A
Excellent product. Don’t think, just buy and use.
L**A
It works and last long time clear to on lens of vehicles
L**O
What an amazing product! Made my lights like new and arrived next day. Amazing product
D**H
Headlights much improved.
Trustpilot
1 week ago
1 month ago