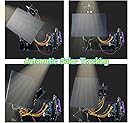
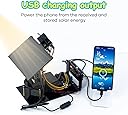

☀️ Track the sun, code your future!
The LAFVIN Solar Tracking Starter Kit is a compact, plastic-constructed DIY STEM project designed for learners of all ages up to 144 years. It features dual-axis solar tracking technology and comes with a comprehensive tutorial and graphical programming code compatible with Arduino IDE, enabling users to build and program a smart solar tracker that converts light energy into electrical energy while enhancing coding and electronics skills.
| ASIN | B0CG8Y8F4X |
| Age Range Description | Kid |
| Age range (description) | Kid |
| Best Sellers Rank | 147,122 in Business, Industry & Science ( See Top 100 in Business, Industry & Science ) 5 in Solar Trackers |
| Brand | LAFVIN |
| Brand Name | LAFVIN |
| Customer Reviews | 3.6 out of 5 stars 24 Reviews |
| Educational Objective | Coding Skills |
| Included Components | CD |
| Item Dimensions | 27.9 x 17.8 x 5.1 centimetres |
| Item Type Name | 1 |
| Item Weight | 0.72 Kilograms |
| Item dimensions L x W x H | 27.9 x 17.8 x 5.1 centimetres |
| Item weight | 0.72 Kilograms |
| Manufacturer | LAFVIN |
| Material Type | Plastic |
| Maximum Age Recommendation | 144 |
| Size | 7 x 11 x 2 inches |
| Theme | Physics |
| UPC | 732214748019 |
D**N
I rarely write harsh reviews, but this deserves it since I reached out about a broken/cracked transistor on the battery housing, and received no reply. I got about 70% complete and had to stop because parts broke simply from popping them out of their acrylic holding thing so watch out for that. I was really looking forward to using this, since I am in the industry, but when you get through a lot of the build, and you see broken and cracked parts, it's very disappointing. I would noy recommend buying this unless they make some changes to how it arrives to the customer.
R**N
I took my time and stopped the video for the instructions. Did break two of the locking pins legs on one side. Had to file the tips of the legs to side them in place. It is sitting here tracking the lights in the room. The shine does not Sun shine in the window, After I get the batteries I will try it outside. Then write a report.
N**.
I managed to assemble this kit, but with some issues to deal with. The code worked without an issue. The unit is now tracking the Sun and charging the 18650 batteries. 1. die cut parts are not easy to get out of the template 2. sanding, and X-acto knife to clean up and make things fit 3. plastic is very brittle and breaks easily Here's a couple of things that helped me: 1. good quality CA glue ( to glue any pieces that break ) 2. finger nail emery boards / hobby files 3. X-acto knife 4. double sided padded tape (2mm thick) Note: 1. the instructions for step 15 should be partially done before step 14. Because the LDR sensors have to fit through the square holes. I used doubled sided padded strips to hold the LDR sensor initially, then added the screws. 2. I'm adding some rubber feet to the bottom for prevent slipping and scratching 3. The exposed lithium batteries in the charger unit should be covered with cardboard or something to keep the heat down from the Sun.
S**L
Way to complex for me to get assembled and working with the poorly translated English instructions. Learn Chinese before buying!
F**N
I was really excited for this kit and tore into it as soon as it arrived. I have to admit that I was really disappointed. The instruction PDF is lacking a lot of detail. For example it says to hook the unit up to a computer, but doesn't say anything about what part to connect out of the large number of ports and cables. In addition, some of the parts are just cut wrong. Two of the mushroom-shaped lock tabs broke as soon as I tried to insert them into the slots where they belonged. I had to drill new mounting holes for the light sensor PCBs, because none of the mounting holes lined up with the holes in the PCB while still keeping the slot free. One of the battery box mounts occludes a USB-C port that may or may not be needed for something, but I don't know because there's nothing in the instructions about it or how to deal with the fact that the mount cannot be installed fully due to the port in the way. Of course, that's not much of an issue, now, as the battery box mounts both broke as soon as I set the unit down after installing the battery box. This may be one of the most frustrating, least tested and developed, and altogether disappointing kit of this nature that I've ever seen. If I were a young kid trying to build this, I would be frustrated to the point where I would be sorely tempted to trash the whole danged thing. As it is, I come from a tech background, and I'm STILL tempted to trash the thing. At least I'll be able to adapt the concept and some components to a larger unit, after I work out the bugs in this one. This producer really needs to go back over this product and documentation and correct a LOT of issues. This is not ready for prime time and, frankly, I'll probably asking for a partial refund.
Trustpilot
1 month ago
3 weeks ago