Desertcart purchases this item on your behalf and handles shipping, customs, and support to Netherlands.
🌌 Unlock the universe—your portable gateway to the stars!
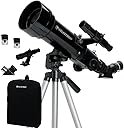
The Celestron 21035 Travel Scope 70 is a lightweight, portable refractor telescope featuring a 70mm fully-coated objective lens and dual eyepieces (20mm & 10mm) for versatile magnification. It includes a stable altazimuth mount with a smooth panning handle, a preassembled tripod, and a custom backpack for easy transport. Perfect for beginners and casual astronomers, it also comes with a free download of Starry Night astronomy software, making it an all-in-one kit for on-the-go stargazing and terrestrial viewing.


| ASIN | B001TI9Y2M |
| Best Sellers Rank | 1,921 in Electronics & Photo ( See Top 100 in Electronics & Photo ) 5 in Telescopes |
| Box Contents | Optical tube | Mount/tripod (preassembled) | 20mm eyepiece | 10mm eyepiece | 45° erect image diagonal | 5x24 finderscope | SkyPortal app | Celestron's Starry Night Basic Edition Software | Manual | Backpack to store scope and accessories |
| Brand | Celestron |
| Brand Name | Celestron |
| Coating | Fully Coated |
| Compatible Devices | Finderscope, Star Diagonal, Eyepieces |
| Customer Reviews | 4.3 out of 5 stars 14,383 Reviews |
| EU Spare Part Availability Duration | 2 Years |
| Exit Pupil Diameter | 35 Millimeters |
| Eye Piece Lens Description | Barlow |
| Eye piece lens description | Barlow |
| Field Of View | 1.43 Degrees |
| Finderscope | Built-on StarPointer™ red dot finderscope |
| Focal Length Description | 700 millimeters |
| Focus Type | Manual Focus |
| Global Trade Identification Number | 00050234210355 |
| Item Dimensions D x W x H | 45.7D x 17.8W x 35.6H centimetres |
| Item Weight | 4.2 Pounds |
| Manufacturer | Celestron |
| Manufacturer Part Number | 21035-CGL |
| Model Name | Travel Scope 70 with Backpack |
| Model Number | 21035 |
| Model name | Travel Scope 70 with Backpack |
| Mount | Altazimuth Mount |
| Number of Items | 1 |
| Number of Packs | 1 |
| Objective Lens Diameter | 70 Millimetres |
| Objective lens diameter | 70 Millimetres |
| Optical tube length | 431 Millimetres |
| Optical-Tube Length | 431 Millimetres |
| Power Source | Battery Powered |
| Product Features | Hochwertige, vollständig beschichtete 70mm Objektivlinse, leichtes Rahmengewicht, mit Tragemöglichkeit, zwei hochwertige Okulare, Zenithspiegel, kostenlose Starry Night Astronomie-Software |
| Telescope mount description | Altazimuth Mount |
| UPC | 050234210355 |
| Unit Count | 1.0 count |
| Zoom Ratio | 2:1 |
E**G
Brilliant little scope - 100% recommend.
"The best telescope is the one you use the most" so they say. I have searched the internet, read hundreds of articles, read magazines, toyed with the idea of getting a 'proper' telescope (such as the Celestron Astromaster 114 reflector or the refractor 70AZ) but had a moment of clarity: apart from the first few weeks, when am I REALLY likely to go to the effort of setting up a big scope? I mean they're really big and unless you keep it by the back door it means lugging it down stairs, plonking it in the yard and wrestling with the various knobs and bits to, finally, get a view of the moon or a nebula. Sure, they'll look good but to be honest, like my rice-cooker or the sandwich toaster it'll sit there gathering dust and eventually end up broken or in the loft... Now, I thought of binoculars but, I have some of those and they're 10x mag. They're fine if you like to see streaks of light as the stars zip about your vision like fireworks. Get a tripod? Well, for the money, big (I say big when actually the biggest are only 15x) binos are not all that great and like someone on already said Amazon saide you'll need to be Data from Star Trek if you plan on holding them - forget it. No really, forget it - bins are a big disappointment for the stars. Only German soldiers in my WW2 picture books and bird watchers have them. The Celestron travel scope is like one half of a MASSIVE pair of binos. From 20 to 40x mag they walk all over binos in terms of brightness and magnification. I have packed it in its little bag (very useful believe me) and carry it up the Malvern Hills. Try doing that with a reflector.. In the perfect 360 view up their I've seen the heavens explode into life. I can get it outside, set up and marvelling at the moon or a nebula in 2 mins. Gaze and Go. Every night I have a quick scan at the heavens then get back to putting bath sealant around taps or whatever grown-ups do at night. Great. Build quality is absolutely great. Sure, you have to be delicate with the controls and not heavy-handed but it's a telescope - what did you expect? If you're too rough to handle it then take up judo instead. I am careful with my lovely little scope and it opens up the skys for me and my little daughter every clear night. I can't believe how brilliant it is. My daughter saw a hot air balloon in the sky today - so small it was barely visible. In 45seconds we'd found it on the Travelscope and could count the occupants in the basket and watch the flames light up the red envelope - completely perfect. Maybe you could get a better stargazer... maybe you could get a better bird watcher... but could you get a lovely little instrument that could do both for 70 quid? (2 million US dollars)if I drop it and smash it I'll be sad but get onto Amazon and get another. It should be 160 quid (85 million dollars).. but don't let Celestron know they've mis-priced it! Want a cheap but perfectly useable scope for looking at the moon and birds and ships at sea? Want to use it every day? Are you not a Wall Street banker? Get this little beauty. If you really get hooked with astronomy then in a year get a reflector. You'll still only use the travel scope mind you! Hope my review gets you looking up and going "Wow!"
G**F
the telescope not that I am an expert in such things but being a photographer I do understand light and lenses appears to be exc
Where do I start, this was bought a year ago for my 13yr old son who decided to take Gcse Astronomy, so this is a parents revirw with a little input from him. Its a lovely affordable kit and comes in one box, the telescope not that I am an expert in such things but being a photographer I do understand light and lenses appears to be excellent the eyepieces are good quality and similar to a camera with an added lens can be improved upon by buying set of more expensive ones but then this is for a child and they arefit for his pruposes. The bag is lovely as it means the whole kit is in one place and easily stored a massive plus point for anybody whose the parent of a teenager who sees his or her bed room as a massive skip with a door. Now for the negative in my eyes the tripod if you can afford it replace it, it is a really low end budget model and is not very stable and easily adjusted in my eye's, the good news is if you are the owner of one for photographic purposes they fit on this base perfectly. Overall I would say this was a perfect compromise between cost and quality. Having used it now a few times over the last year I think it is good value for money and a great starter kit if like me you have a young person taking up a new hobby and can't afford to purchase an all singing all dancing model. If you wish to use this for Astrophotography and have a Digital Slr all you need to purchase is a T-Mount ring for your brand of camera. There is a celestron adaptor eyepiece which we do have but you dont necesarilly need to purchase one as it has a t2 thread on the focusing barrel. my advice is if you can find one of these for about £60 buy it you won't be disappointed. I have also used it as a day telescope bird watching it is not ideal or looks the part when amongst "professional" bird watchers but does a reasonable job. Update we have just decided to up grade this product Sept 2015. Its good!! made sure I did not waste £500 pounds but after almost a year we are upgrading and its going to be a big hit. We have used it for astro photography but it needs a motorised mount to get better pictures hence the upgrade. With wildlife things are great and we've managed some decent bird pictures and lovely landscapes can be zoomed in on. I bought a barlow adaptor and t2 adaptor for my Nikon Digital SLR and it give a lovely picture but you do need to take the pictures in manual setting as all the gizmos on my D90, D80 and D50 bodies do not work due to no electrical connections. I have learnt a lot and my son has also last nights blood moon was lovely through the lens just ensure you have a moon filter.
D**D
Celestron 70mm Travel Telescope: great value spotter/astro scope – with potential as a 400mm F5.7 telephoto lens
For around fifty quid this is a decent little travel ‘scope. The main tube is aluminium, the objective lens is an air spaced doublet, and its dual photo-tripod / dovetail mount will also allow it to fit on a proper astronomical equatorial mounting. Throw in a backpack, a couple of eyepieces, an erecting prism and a tripod and you have an excellent value package. The bundled eyepieces are considerably better than expected for the money and give x40 and x20 magnifications (10mm and 20mm respectively). The rack & pinion focuser and the objective lens mount unfortunately are both made of plastic. The tripod is wobbly when the legs are extended and the pan/tilt head is not the smoothest I’ve seen - but it is better than nothing and you can always buy a decent photographic tripod or even a proper equatorial mount later. The optics of this package may not be perfect but they are fine for direct visual use - offering sharp detail, low colour fringing and fairly wide flat-field views. Whilst perfectly usable as a spotter, you should note that the 'scope is not weather-proof. I bought this on a whim – interested to see whether it might be usable as a telephoto lens. Where else are you going to find a new 400mm f5.7 lens for this money? Out of the box, the ‘scope seems reasonably sturdy (tripod excepted). For direct visual use, the image quality it offers is very respectable and much better than any of the half-dozen sub £100 spotters that I have to hand. As a telephoto lens, however, it suffers from low contrast due to internal light scatter from the side-walls, a lack of ultimate sharpness from optical misalignment, evident edge of frame focus-softening (due to field curvature) when using large sensors (APS-C or larger), and of course, from the curse of all refractors: chromatic aberration. Here’s a quick dissection of the product - as delivered … T-Mount The handbook doesn’t even bother to mention it – but the outside of the eyepiece holder is threaded. If you have a T-mount adapter for your camera then you can mount your dslr etc directly on the back of the ‘scope for prime focus photography. Rotatable eyepiece mount The eyepiece mount is a screw-fit onto the chromed focuser tube (both are plastic, sadly) and has an associated locking collar – together these features allow you to square-up any attached camera without having to fiddle with a T-mount’s grub screws. Adjustable pressure plate on the focus tube: A knurled screw at the back of the plastic focuser housing allows you to softly clamp the focuser tube in place (to prevent inadvertent focus shifts). The chromed plastic focuser tube slides smoothly in its guides and, with very little backlash in the rack and pinion, offers precise and easy focusing. Focus travel: For visual use (20mm eyepiece plus erector prism) the closest focus is about 13ft from the front of the scope. The focuser tube has about 70mm of available travel - and the point of focus lies about 50mm outside of the fully racked-out eyepiece holder. Notice that this means that you cannot focus the scope when using eyepieces alone (for traditional inverted astro views), the erector prism (or an eyepiece extension tube) is essential to provide an adequate optical path length to give a focused image. The scope, however, readily allows infinity focus with a dslr on a T-mount (tried with Pentax and Olympus dslrs) – though with mirrorless compact system cameras extension tubes may be required to compensate for their shorter lens-mount to sensor distance. With a heavy camera, however, to reduce the extent of ‘rack-out’ of the focuser and the consequent strain on the thin plastic focuser tube, I'd advise the use of a camera-extension T-tube. Extension tubes have the added advantage of enabling closer focus. Eyepieces: The eyepieces have standard astronomical 1.25 inch push-fit mountings – with real, chromed-metal, nose-pieces. The 20mm eyepiece is a three element inverse Kellner (I’ve not taken the 10mm one apart yet!). It offers a very respectable image: geometric distortion is not excessive and sharpness is good across the claimed 50-degree apparent field of view. The 10mm eyepiece is ok – but the apparent field of view is noticeably less than that of the 20mm one. Lens Cap: The supplied lens cap is a two piece item – offering the option of viewing through a central aperture of about 42mm in diameter (effectively reducing the scope’s aperture from f5.7 to about f9.5) … handy for looking at bright targets. The restricted aperture also has the useful side-effect of reducing chromatic fringes. This smaller aperture, however, causes a degree of vignetting - so that photographs darken towards the edges and corners of the frame when using 4/3rds and larger sensors. For smaller sensors (e.g. ¼ or 1/3 inch web-cams or CCTV cameras) this is not a problem. Alignment: The optical axis of the focuser is out of alignment with the centre of the objective’s mounting (by about 4mm in my case) and it shifts as you tighten the focus tube clamp screw. No collimation or centring adjustments are provided. Moulding ‘flash’ in the lens holder and on the lens retaining collar means the objective lens is not squarely seated or evenly clamped. Contrast: The objective lens is not edge-blackened so image contrast is lower than it could be. The lens retaining collar is polished and reflects general glare down into the scope. The inner barrel of the eyepiece mount is polished plastic (very bad - if using a T-mount for prime focus photography). The push-on lens hood is too short to offer much protection from stray off-axis light. The internal baffles and the smooth matt black painted interior are of only limited effectiveness in controlling light scatter. Field curvature limits the scope’s photographic (prime focus) usefulness to small sensor cameras (4/3rds or smaller). Mechanical: A heavy camera attached to a 1.25 inch push-fit adapter (e.g. for eyepiece projection) would be in serious peril of falling to the ground because the plastic eyepiece holder has only two, small, eyepiece-securing screws. Only the T-mount option offers adequate mechanical security to an otherwise unsupported camera. Some simple suggestions for DIY Improvements (this is for dedicated tweakers only): Please note – implementing some of the following suggestions will invalidate your guarantee … so proceed at your own risk. 1 - Fit a longer lens hood: Non image forming light, bouncing off the interior of the scope, floods your camera’s sensor with useless illumination – sapping colour-saturation and contrast from the scene. This is less problematic with direct visual observation (or photography through an eyepiece) - as the eyepiece’s restricted field of view shuts out some of this indirect light. A camera’s naked sensor, on the other hand, has an extremely wide field of view, it can ‘see’ the illuminated side-walls just as well as it can see the direct image-forming light from the lens, so considerable pains should be taken to prevent indirect light falling on it. The simplest and least invasive improvement would be to extend the length of the plastic lens hood using a tube of (black) cardboard … 12 inches or so should work wonders. 2 - Line internally with velvet or felt: The interior of the narrow bore focuser tube is particularly prone to scattering off-axis light and funnelling it down towards the camera’s sensor. Black felt is a good lining material though the best absorption of stray light is obtained with velvet. The front half of the main tube will also benefit from a lining of black cloth. 3 - Insert an eyepiece’s nose-piece (for prime focus photography): The inner barrel of the eyepiece holder is polished plastic – it reflects light easily and for prime focus photography this needs to be tamed. The simplest solution is to borrow the chrome nose-piece from one of your eyepieces, line it with felt and fit an O-ring over one end. The O-ring will stop the nose-piece falling into the ‘scope and damaging the objective lens. The O-ring will also block the sliver of light that squeezes through the gap between the outside of the nose-piece barrel and the inside of the eyepiece holder. 4 - Remove mould flash from the lens mount and retaining ring: The objective lens sits on a ring moulded into the plastic lens holder and is then clamped in place by the screw-in front retaining ring. Both the seating ring and the retaining ring show slight moulding ‘flash’. This needs to be removed. Use a small craft knife to scrape away the excess plastic from the lens mounts – to provide a level seating surface and an evenly-distributed retaining-pressure for the lens. When reassembling, the retaining ring should be tightened only just enough to stop the lens rattling within the mount … excessive and uneven pressures will cause the lens-pair to distort. 5 - Black-edge the objective lens The matt-ground edge of the objective lens scatters non image forming light into the ‘scope. The lens is a doublet:: a pair of lenses separated (and held together) by three small plastic wedges sandwiched between the front and rear elements. You can remove the lens-pair from its mount (taking care not to separate the two elements) by unscrewing the front retaining ring. Cleanliness is vital - handle the lens only with soft glass-cleaning cloths or cotton gloves. Use a black permanent marker pen to blacken the edges of the lens pair. Note – the thinner of the two lenses is the outermost one – so reassemble accordingly. 6 - Paint the lens retaining ring matt black: The lens retaining ring has a smooth polished inner surface which reflects stray light down into the scope. Line it with felt or paint it matt black. 7 - Collimate: Although no collimation adjustments are provided there are a couple of simple things that can be done to improve the scope’s optical alignment. You will need a laser collimator for this – available on Amazon from around £20. If you fit the collimator in place of an eyepiece, its beam will partly bounce-back from each of the air-glass surfaces of the lens. Three reflections should be seen in the collimator’s window (four - if you are extremely unlucky) – they will not be narrow pinpoints as they are reflecting from quite highly curved surfaces. Ideally, however, all the reflections should centre on the laser’s exit aperture in the middle of the collimator’s screen. You will be lucky indeed to have three such centrally co-located reflections. In my case, initial tests showed only one reflection on the collimator’s screen … the other two were so far off-axis that the reflected beams didn’t even make it back into the eyepiece holder! 7.1 - Align the Axes of the Focuser and the Main Tube: To see how far out of ‘true’ the axis of the focuser is with that of the main tube try the following test. On a thin sheet of paper, scribe a circle with a drawing compass. The scribed circle needs to be exactly the same diameter as the outside of the main tube. Remove the lens hood and the objective lens-holder then temporarily tape or glue the paper circle over the open end of the main tube - ensuring that the rim of the tube lies exactly on top of the scribed circle. The pinprick on the paper (caused by the compass) will then lie on the central axis of the main tube. Fit the laser into the eyepiece holder and switch on. The distance between the central pinprick and the laser spot shows just how far out of alignment the focuser is with respect to the main tube. If the laser beam lands on the centre of the scribed circle, consider yourself lucky. If, however, the laser spot is far adrift from the scribed circle’s centre point then you can try the following tweaks: Remove the three screws that fix the focuser to the main tube. Rotate the whole focuser assembly and see whether the laser spot moves towards the centre of the paper circle. I was fortunate; I found that I only needed to rotate the entire focuser unit by one screw-hole (i.e. by 120 degrees) to obtain a reasonably centralised laser spot. If you find that an intermediate degree of rotation gives the best result, you can bore three new pilot holes in the focuser’s plastic body – to accept the original retaining screws. More drastic remedies include elongating the three screw holes in the main tube - allowing the entire focuser to be 'wiggled' into alignment. 7.2 - Centre the Objective Lens: The objective lens is a loose fit in its holder – there is perhaps a millimetre or so of lateral rattle-room to play with. Having first aligned the focuser’s axis with that of the main tube, you may then care to try moving the lens from side to side, within its holder, to try to make the multiple laser reflections all fall on the centre of the collimator’s screen. This needs to be done with the scope pointing vertically up - and the lens clamping ring removed. There may not be sufficient ‘free play’ available within the lens mount to achieve perfectly returned reflections – but, as in the case of the focuser unit, you can also try rotating the entire lens mount by 120 or 240 degrees to improve the degree of coincidence of the multiple laser-spot reflections. The reflections test is extremely sensitive and the simple the act of tightening the eyepiece retaining screws to clamp the laser will cause large shifts in the positions of the returning laser spots – so don't be overly concerned with precise spot locations … just getting them all onto the laser's target screen is achievement enough. None of the above suggestions should be regarded in any way as condemnation of the 'scope. As a visual scope for spotting or simple astronomical viewing, the compromises of design and construction have been well chosen by the manufacturer and, straight out of the box, it performs much better than its modest price tag might suggest. Asking it to perform in more demanding photographic applications, however, shows the need for better control of stray light. Fortunately these simple mods are well within the capability of anyone raised in the ‘Blue Peter’ school of diy – and tackling them should reward you with a more versatile and better performing bit of optical kit. I give it five stars – for its value for money – and for the ease with which inveterate diy-ers (like me) can have a go at pushing its performance towards the limits of its theoretical capability.
M**S
The spotter scope mounting fits easily to the main body via two chromed nuts
Brought for two 8 yearolds girls it has only been outside once, and that was in the daylight as a test run. Have yet to point it at the sky in anger. The scope came well packaged and in a strong box. The hardest thing to set up was the angle on the spotter scope that fits on the side of the main telescope, as this has to line up with the main scope so that you can find your target quickly before moving your eye to the main scope to view it at close quarters. The spotter scope mounting fits easily to the main body via two chromed nuts, but it is the setting up of this scope via three equally spaced pins that proves the hardest thing to achieve, especially as you have to get the cross hairs on the spotter scope to line up to roughtly the centre of the main scope. It does not help that the image in the spotter scope appears upside down. That said, that was the hardest thing to achieve, but that might just be me! The rest of the scope fits easily together with everything being held in place by chromed pins which are all in place on the body and just require screwing in to hold the pieces together, (no packet of mixed pins to sort over). The trypod has four telescopic sections that simply pull out and are locked in place with catches and a central column for another foot of height at the top where the platform sits that holds the body of the scope. The platform has a spirit level set in it, should you need one, and can angle up and down with the use of locking handle and be locked in place to that it can be moved horizontally via another locking nut. Having never had a telescope before I tend to hold it when using it, I suppose on a stronger more robust stand this might be alright, but not so on this model. After use the scope easily packs away into the bag provided, as there is more than ample room, and I leave the spotting scope in position on the side of the main scope. I would recommend this product to anyone who doesn't know if they are into star-gazing or not and would like a go and at half price it is a good time to find out. And as to the age old question of why is that person stood on the top of Malvern Hills not moving, that's because it's a tree!
M**S
The sighting scope is a bit odd
You use the sighting scope to get the main scope looking in the right direction. If you’re out and about using the portability having to align the sighting scope to the main scope each time may cause difficulty - it’s an odd arrangement that instead of sliding in a neat reasonably close fitting tube it is sloppy and loose and needs fine adjustment. If your intended use is long distance static objects in daylight it’s probably a great device. It’s fab if your plan is to study the moon at night. However, for star gazing it’s a bit disappointing - magnification insufficient to see much of anything and too much for constellations.
K**O
Perfect for viewing the moon with kids!
Just to put my review in context. I, and my children, are total beginners. In fact, I’ve never viewed the moon through a telescope until now. In my opinion this is an amazing little telescope for viewing the moon with kids. It comes with two eyepieces. One eyepiece gives a clear and easy to view image. The moon appears relatively small in the viewing space, but crystal clear and surface details are noticeable. The second eyepiece is a little trickier, especially for the kids because the slightest wobble can knock it out of alignment with the moon. However, when you get it right, it magnifies the moon so it fills the majority of the viewing space. This makes it easier to see the craters. I also bought a phone mount and after a few nights of trial and error I managed to capture some nice images (I have cropped the images and increased the contrast by editing them) but I am pleased with them. I’m not sure this telescope will be any good for seeing Saturns rings or the lines on Jupiter. The tripod is definitely rubbish, as many other reviewers have noted, but ok for moon viewing providing you don’t touch the telescope once you finally have it lined up. In summary, if you’re after a telescope for kids or you just what to look at the moon then this is perfect.
O**2
a truly portable package
I've now had this little scope for around 18 months and thought that it was time to leave some feedback. Pros: - very good price. - lightweight and compact, and with the included backpack the whole package becomes very portable - well suited to terrestrial use like bird watching etc. - included 20mm and 10mm eyepieces are of ok quality - scope optics are of surprizingly good quality allowing sharp, high contrast images (with some CA) - can be customised/upgraded Cons (mostly for astronomy) - included tripod is of poor quality and at high magnification pretty useless due to its wobble and difficulty to finely adjust - included tiny, plastic finderscope is also of poor quality and hard to use effectively - no 90 degree star diagonal included (instead its a 45 degree erect image prism diagonal) Summary: - for terrestrial, low magnification use when you don't worry about the need for a finderscope, this scope works well - for astronomy, its in its raw state its severely limited by the cons listed above. That said, I've since stuck on a more robust photo tripod with a decent ball head and added a red dot finder and its made a huge difference. Once this is done I've really enjoyed views of the moon, jupiter, saturn, m45 etc, but of course objects are still small. Don't expect to push its magnification beyond x100 or so. - Key attraction to me is its small size and convenience, I use it a lot since its so quick to setup. - Small enough to take on holiday / overhead luggage. If you are serious about getting into astronomy and want to look at more than the moon I would think carefully about buying something with a better mount with slow motion controls and a decent finder, as such things really do make a difference. This will involve spending a bit more money though. However, for a multi-purpose, grab and go, highly portable piece of kit it works pretty well and is a good compliment to larger, bulkier, heavier equipment.
J**N
For the money, this is a good scope. I'd recommend it for beginners
I've been using this for astronomy for 2 years now, starting as an absolute novice.. It fits inside a small rucksack making it great for taking around. It's been with me on holiday around the country and has been great at helping my girlfriend get into astronomy. I would recommend this scope for beginners as it's easy to set up and relatively low cost. It is important to limit your expectations with this scope. It won't show you anything like the pictures NASA takes. It can also be tricky to identify exactly what you're looking at. The side scope will likely require adjustment every time you set the scope up. I like to use a star tracker app on my phone/tablet to help identify exactly what I'm looking at. The tripod is good quality, although the legs aren't long enough to use while standing. It's fine for kids or if you sit down. Everything assembles easily using thumbscrews. I did also buy a phone mount to try and take pictures. For astronomy, this scope isn't powerful enough for decent photos, but I did get some half decent photos of the moon and using it during the day out in nature.
M**5
Początki super
F**…
Memnun
Memnun kaldık güzel bi ürün ayı çok net görebiliyoruz
T**R
Zeer matige kwaliteit accessoires
De schroefdraad van het statiefplaatje ontbreekt, dus kun je de kijker niet op het statief vastzetten. Ik zet de kijker daarom op een eigen fotostatief, en dat gaat goed. De richtkijker is speelgoed. Toch nog 2 sterren, de kijker zelf is redelijk te noemen voor deze prijs. En het geheel is licht en makkelijk vervoerbaar.
V**S
Paciencia para focar planetas
Gostei da facilidade de montagem. Muito leve, prático, bem acondicionado. Já sabia que não seria fácil observar planetas, pois como moro em uma cidade onde a luminosidade é muito alta, fica mais difícil. A visualização da Lua Cheia foi fantástico. Satisfeito com o produto. Atendeu minhas expectativas.
Z**A
el refractor tiene truco:la pupila de salida
Esto va pera todos aquellos que disponéis de este telescopio: disfruto de varios prismáticos astronómicos en formatos 20x90 20x80 15x70 y 10x50 también tengo un refractor 120mm.ATENCION para obtener de una imagen luminosa y detallada teneis que obtener 3 oculares:25mm 27mm 30mm y 40mm.El secreto esta en obtener una pupila de salida superior a 4mm / 25mm=4,3 mmm a 16x 30mm=5,2mm a 13x 40mm=7mm a 10x. El ocular de serie el de 20mm con 40 grados de visión, la imagen no es lo su ficiente brillante por la aperura del refractor 70mm para eso debería de ser 80mm de diámetro.En amazon disponéis de varios oculares de bajo coste Orbinar muy buenos con un campo de visión de entre 50-70 grados a un precio entre 15- 50 euros. RESULTADOS imágenes nítidas y detalladas DEL ESPACIO PROFUNDO DE GRAN CAMPO con nebulosas y cúmulos abiertos cerrados y galaxias como andromeda m81 m82..... Para uso DIURNO las imágenes son de ALTA DEFINICION.La pupila de salida se obtiene dividiendo la apertura del telescopio entre el aumento. El aumento se obtiene dividiendo la distancia focal del telescopio entre los mm del ocular.Hacer la prueba y contareis vuestras impresiones asombrados de como se transforma el telescopio.Recordar que es un refractor y las imágenes son mas definidas que un reflector.Todo esto en un telescopio de viaje.Para planetaria admite 100x como máximo con un ocular de 4mm, mas aumentos la imagen es borrosa.Fijaros que mis prismáticos astronomicos tienen una pupila de salida entre 4-5 mm.Con el ocular de serie de 20mm son 3,5mm y de hay para arriba el refractor se transforma en un traga luz.
Trustpilot
4 days ago
3 days ago