

Full description not available
| RAM | 2 |
| Hard Drive | HDD |
| Card Description | Dedicated |
| Brand | OWC |
| Series | DT01ACA |
| Item model number | OWCYIMAC11H2.0 |
| Hardware Platform | Mac |
| Item Weight | 2.39 pounds |
| Package Dimensions | 10.35 x 7.48 x 4.76 inches |
| Color | Black |
| Flash Memory Size | 2 TB |
| Hard Drive Rotational Speed | 7200 RPM |
2**D
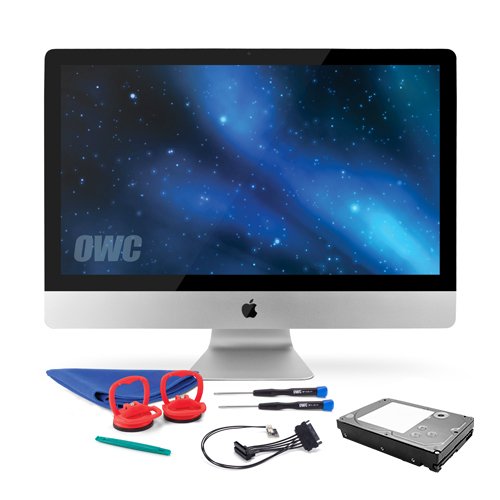
Easy Install, Just Follow Video Instructions
The old hard drive died on my 2011 iMac. The iMac would have headed for recycling, but I wanted to keep it as the beater computer for my kids to use, so I gave this HDD upgrade (replacement) kit a try. Instructions say that replacing the hard drive is a job that requires a bit more skill, but it ended up being a piece of cake when I followed the YouTube direction video.The computer works great again.The kit comes with everything you need, except for some tweezers to grab the small screws. I needed the tweezers to keep the screws from being pulled into the powerful magnets that hold the screen to the iMac chassis.I also got a cheap antistatic mat & wristband thing to protect the electronics while I was poking around in there.
S**.
Perfect fit, and it works great.
I have some experience with computer hardware and software, so I wasn't intimidated with installation. But the videos on OWC were great, so anybody with skills with tools and especially patience can install this. The tools provided worked perfectly. I wish I could have bought a smaller hard drive, but I can't complain about what I bought. Re-installed the Mac OS and my old iMac (mid-2011) is back up and running, with twice the hard drive (and a faster one!). OWC is terrific.
B**H
Some details that are not in the video
I did it 2 days ago and yes it works !So I would definitely recommend it.Here are some details that you might find helpful.1 - First, there are two stickers that keep the screen stuck to the back frame. The video did not show the peeling of these stickers.2 - Second my Mac inside was SUPER DUSTY, so be prepared to not be able to see the connections as clear as the video. If I had known this earlier, I would have bought some air sprays and also taken apart my Mac in a location where I could blow dust everywhere.3- Third, I was not able to remove the top left connector as easily as shown in the video (the first connector in the video). I had to use two screwdrivers to nudge it out, it has two wires that look flimsy so I was afraid to pull it.4 - Fourth the connector with a flip and flap is a bitch to put back in.5 - Next, one of the rubber suction cup left a mark on my glass that took a while to clean, but I was able to clean it.6 - Tweezers are not included in the kit, just two screwdrivers and a plastic lever like thing. Fortunately, my screws did not fall in or get caught into any magnets.7 - Other reviews have said the new hard drive is a lot noisier but I didn't experience this, it sounds about the same as the previous one. In case you were wondering, my old hardrive was a Seagate, and this new one is a Toshiba.8 - Lastly, I feel my MAC is running a little hotter than before, but I have no way to confirm this. One of these days I plan on reopening it and dusting it, maybe the fans could use a little help.Some more details that might be helpful but not related to the upgrade.I used a bootable USB with Sierra (10.12.6) and used this to erase the new drive, then install Sierra onto the new drive.The computer rebooted and I did a new install onto this drive.I had enabled the iCloud Drive prior to my previous disk failing, so I just signed in with my Apple ID and my files have started reappearing.I was sad to discover that iCloud does not back up any music from iTunes, so only iTunes purchases will be available, other music I will have to recover from an old time machine backup.I still haven't rebuilt my photos library, but apparently it can be done via iCloud.So overall the video is great, I watched it a few times and followed it during the upgrade. The solution is great, my MAC is running well. It's been two days so far, so if anything changes I'll come back and update this review, but for the moment, this solution rocks, go for it!
S**E
Works great....saved me lots of money
Installed this today (5/11/19) and so far so good. Works great, the hard drive is pretty quiet, and everything I needed (except a can of air for dusting) was included. The instruction video was a bit hard to find due to the link provided in the included instructions being outdated. Once found, it was very helpful especially in showing how to hide the extra bit of cable and connectors that comes with the heat sensor. This will save me lots of money for now since my old drive was full and I was wanted to buy a new Mac!
P**E
Great Product, Easy Install
Hard drive crashed in my 2011 imac. Rather than spend 2k for a new one i got a new drive and in about 60 minutes had a machine up and running again.
T**O
Only if I could tell...!
One of the connections from computer doesn't seem to fit anywhere on the HD....Having said that, why is it that is almost impossible to open up a HD whereas very easily they get "burned", malfunction, etc. And why so sturdy of a component yet the wiring from the computer to the screen is but brittle to the touch...oh and those little clips that the hardness plugs to ...forget it is all junk!
R**D
It worked!
I have an 11 year old iMac model 12,1. The thicker kind that you can easily open the screen to access the inside, unlike the newer “we will make you buy a new one” model that can’t be upgraded easily yourself. It still worked well. The hard drive gave out after nine years. Expected. If I took it somewhere to get fixed it would have been around 3-400 bucks and not easily done during a pandemic. So I chanced it and purchased this kit. The many positive reviews were all spot on.The end result is it works and comes with everything you need, except tweezers. The video tutorial is on YouTube. Some insight. Find some good tweezers. The kit doesn’t come with them and you will need them to put the hex screws back in as the magnets make that tricky. Also, the take your time and have another person around in case you need another pair of hands. You likely will. My man fingers were too fat to easily pull some of the cables out. Also, the first cable you need to pull out is very tricky and easily breaks. Wiggle it side to side and it will give way eventually. The hardest part of this process was reinstalling the OS multiple times. High Sierra is the best you get in this machine due to the old chip set. I first reinstalled Snow Leopard and then had to install Sierra, and then eventually High Sierra. That was a lengthy but not difficult process. Good luck! I’m up and running again and saved myself several hundred clams. :)
A**K
Sencillo
Fácil de instalar y muy buen upgrade para darle una segunda vida a ese viejo equipo
Trustpilot
3 days ago
1 day ago