Desertcart purchases this item on your behalf and handles shipping, customs, and support to Netherlands.
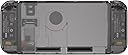
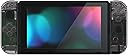
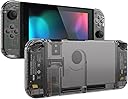
🖤 Level up your Switch’s style with the ultimate transparent black makeover!
The eXtremeRate Transparent Clear Black Back Plate is a premium ABS replacement shell designed specifically for the Nintendo Switch console and Joy-Con controllers. This DIY kit includes all necessary buttons, screws, and tools, offering a perfect OEM fit with a sleek matte transparent black finish. Ideal for gamers seeking a durable, stylish upgrade backed by detailed video installation guidance.


| ASIN | B09LHSSKL4 |
| Best Sellers Rank | 5,714 in PC & Video Games ( See Top 100 in PC & Video Games ) 2 in Nintendo Switch Faceplates |
| Brand | eXtremeRate |
| Brand Name | eXtremeRate |
| Colour | Clear Black |
| Country of Origin | China |
| Customer Reviews | 4.5 out of 5 stars 2,722 Reviews |
| Enclosure Material | Acrylonitrile Butadiene Styrene (ABS) |
| Finish type | Matte |
| Hardware Platform | Nintendo Switch |
| Hardware platform | Nintendo Switch |
| Item Dimensions W x H | 10W x 1.5H centimetres |
| Item Weight | 50 Grams |
| Manufacturer | Extremerate |
| Manufacturer Part Number | QM510 |
| Material | Acrylonitrile Butadiene Styrene (ABS) |
| Model Number | QM509 |
| Number of Items | 1 |
| Product Finish Type | Matte |
| Product dimensions | 10W x 1.5H centimetres |
H**Y
Excellent quality, however I'm not a fan of the clear buttons at all.
The installation took me roughly 2 hours and this is from someone who has a lot of disassembly experience and has already taken joy cons apart before. But this is not an issue at all, just something you should be aware of. The installation was pretty straightforward, the worst part was taking apart the triggers but had no major issues. I'm very glad this kit came with so many spare screws and springs as I had to use quite a few of these! The screwdriver was fine, I ended up using a different set for the installation however as the bits kept falling out but I think this would be fine if you didn't have any alternatives. I didn't like the clear buttons and they weren't up to the same standard as the shells so I decided to opt for using my original black buttons which I think looks a lot better. The shell fits really well together however and I'm excited to see how well it hold up over time as my original shell wore down and went shiny quite quickly. I did have one small issue, a few days after I had been using the system, one of the screws on my joy con came so loose it was sticking out, I haven't encountered this again but this is maybe due to me using the stock screws from my original joy cons instead of the screws included with this kit.
L**E
Excellent product, exceeded expectations.
Extremely good quality feeling materials. Fits the console extremely well doesn't feel like third-party shell at all. And the colours of the product match the image perfectly. The kit also comes with all the screws, buttons and tools needing to take apart the console and fit the replacement shell. I am extremely happy with this product and would buy it again from this company if I were replacing the shell on another console.
D**Y
Let down compared to other XR products
Edit: Company got in touch with a mutually acceptable resolution, good company and glad they reached out. Original: Whilst I love the style it seems like a good 60% of screw holes don't take the correct size screws properly. You will need a little bit of sandpaper or some snips to do clean/flush cuts on the buttons. The original boards fit in okay so it is compatible with the original switch (not lite oled etc), with the above issue. Not the easiest install with how fiddly the joycons can be, especially the right with the IR and nfc hardware. The stand doesn't come with the stand hardware (the single screw/U bracket, every replacement stand I've ever gotten comes with that as part of the stand so it's an odd decision to not include it. The buttons (abxy) can be inserted incorrectly (wrong angles, which with see through buttons can be hard to spot) the originals can't be incorrectly installed. The home button going into the bracket feels a bit loose, will need a dab of glue to stop it falling out. Overall it's the worst extremerate kit I've gotten. I've done many controller reshells using extremerate kits and they always felt premium. I'm happy with the look and feel/texture but it feels expensive for a substandard product. Maybe I just got a badly formed one, ymmv.
J**H
Fun project, looks good
I got the black tint, which honestly I would’ve preferred if it was more black than transparent (but admittedly looks close to its picture). Overall, the shell is great! The kickstand feels a little more brittle than the stock, but still works. The included Phillips screws, to replace Nintendo’s Y screws was also a really nice inclusion. The included screwdriver worked for me, but as others have suggested it’s not the best and is more likely to strip your screws than a name brand - if you’re nervous like I am, and don’t know how to get a stripped screw out, I’d suggest buying a fancy screwdriver for this project.
C**N
Fits perfectly and works exactly as it should
Fits perfectly and works exactly as it should. The quality is great, and the clear atomic purple design looks amazing on the Switch. Easy to install and gives the console a unique, retro vibe. Highly recommended for anyone wanting to customize their Switch.
B**Y
well made shells everything lines up great
not to hard to fit the screwdriver supplied with it was quite good ended up using it for most of the install i did the shell as while i was doing a digitiser replacement, stick replacements the ribbon cable in joycons are super fragile if its your first time installing a shell and you damage a cable you don't have to worry too much you can get the ribbon cables for a few quid,
V**R
DO NOT USE THE INCLUDED TOOLS. Cool idea though.
So to begin with, this is a seriously cool product. It's a nerd's dream to see all the inner workings of things, and this kit pushes all the right buttons. The fit is absolutely fine. No issues there. It's worth noting that the kick "stand" supplied doesn't have rubber on it, so bear that in mind, although even Nintendo's "stand" is next to worthless straight out the box, so I have no opinion on it. Just learn from my mistake and only take out the centre screw on the JoyCon rails. That's all you need to take out to remove the backplate, other than the obvious screws on the rear. I cannot fault them for ease of installation. Nintendo makes a seriously difficult product to disassemble. That said, there were no instructions that I could see. Luckily, the internet is your friend, so it's a moot point. It's a fault of the material that the screws are seriously easy to strip any threads out of the plastic, so just be careful when assembling. If you feel tension draw up, stop. That's all the more you need. This has not impacted my scoring of the product, as everything's a trade-off. You want see-through plastic, you may have to sacrifice some durability. They supply their own screws in PH0, so you can throw Nintendo's idiotic Y screws away and repair your own gear with non-proprietary parts. BIG plus. However. I urge you to immediately throw the "screwdrivers" provided into a furnace to remove them from the gene-pool. They are only worth their weight in scrap metal. They WILL round off your screws, both Y and PH no matter what tricks you pull, and believe me; Nintendo screws their kit in TIGHT. You WILL round the screws and you WILL have a bad day. Just trust me on that. And that's the real failing of this kit. It's a fantastic idea with some expected trade-offs, but the "tools" they provide are actively going to ruin your day. And for that, I will recommend this kit, but only if you A: know how to use a search engine and B: have the right bits from a trusted tool manufacturer. If you don't, I highly recommend you acquire some. Your sanity will thank you.
L**I
Pretty cool looking
As recommended by other reviewers, I discarded the tools and instructions provided and instead used the iFixit kit I already had (no affiliation) and their instructions. It was extremely fiddly and took several hours, but once I got the left joycon done (probably you should do that one first too) I was in the swing of it and was able to do the right joycon a lot faster. The most difficult thing about the backplate was finding the screws, though protip on that one - the joycons use PH00 but the switch itself uses J000 which looks like a PH00 but absolutely isn't, so save yourself some trouble there. I ended up using the original buttons rather than the clear replacements it came with (plus a coloured button pack from the same seller) because IMO they look better, but that's an aesthetic choice. All in all I probably would have saved money and not bought the clear backplate since there's not very much to see through it, but it looks good together so I can't complain.
S**M
Nice
Have now done 2, the quality of the plastic isnt great but overall its a good kit for the price.
K**N
insanly difficult achievement unlocked
The tools will strip the screws because nintendo screws deteriorate faster than a delorean at 88mph. The level of difficulty is absolutely rediculous it makes you question your life choices and just want to smash the joy con with a hammer. Imagine 3 levels of circuit boards you get to juggle with one hand while the other hand tries to balance all the buttons in place so they dont slip then go ahead and connect the ribbons (which are as short as possible thanks nintendo) oh and taking out the L and R buttons is like trying to crack an egg while keeping the entire shell intact. Any slight mishap and expect a broken L and R button ribbon. the Bluetooth is also very short and difficult to reattach. the Left Joy con is easier than the right. Its easier to change a fan on the switch than it is to do these joy cons, oh ya, the screws will strip. find a dagger somewhere to pry them out because they're made of fairy dust. Now for the product. The precision used is impeccable. really really well done! all the little slots for cables actually fit and the everything comes together well in the end, connected and all. The 1.5 Y-bit screwdriver actually worked on this. Also all the springs and provided screws really really help. if possible do not use y bit screws. expect 6 hours if your springs go flying and you have to find it and you have to reattach the ribbon for the L and R button. then do the back plate while you clean up the garbage or while your sleeping because its easy. hope i never have to open it again
M**D
Watch out hole could get bigger
Great product but the holes are not pre tapped so you are relying on the screw to tap it self as it goes in On the right side of these joy con I actually accidentally made the screw hole bigger which the original screw couldn't fit even tho I was using 2 fingers to tighten it. It was on the railing of the joy cons
A**N
The perfect upgrade - Just beware of the included screws!
I am extremely happy with this kit. From the beginning the packaging surprised me. I was expecting it to come wrapped on plastic, but it came nicely packaged in a box. I bought this because I needed to replace my 8 year old battery and fan, so I decided to replace the shell while I had it apart. The back was simple enough with a few screws, but the Joycons took about 2 hours each (I also replaced the drifting joysticks with Hall Effect sticks). I didn't use the included tools because of the bad reviews I saw, which is a shame because the screwdriver handle is machined aluminum, but apparently the bits are too. Instead I used a cheap IFixIt knock off kit I purchased on Amazon years ago. The two tips you'll need are Y000 and a Phillips P000. I also didn't use the included screws, instead reusing the original screws. While the screws aren't marked , it's pretty easy to compare them sides by side with the original ones. At one point I did drop one of the screws and tried using an included screw for the Joycon shell, but I noticed that the screw was slightly too long and too wide, because I could see the plastic start to stress and turn white as I screwed it in. This probably won't be noticeable in solid colors, but stands out in translucent shells. It's not enough for me to take off a point, but definitely worth mentioning. You will also want a small plastic spudger to unclip the ribbons cables inside the Joycons. I think I paid less than $4 for a double-ended 10-pack with various ends. As for the shells themselves, they're are a perfect fit. I didn't use the included buttons except for SL/SR, but instead reused my black buttons and ordered a set of colored round buttons, also from ExtremeRate. One thing to note is that the buttons come on a runner like a model kit, and while they pop right off, sometimes they leave a little burr behind. This probably doesn't affect performance, but is easily filed or cut off with sandpaper, a hobby knife/nippers, or just a pair of nail clippers if that's all you have laying around. My biggest complaint about this whole process is their video tutorials. They include a QR code to their YouTube video which shows how to disassemble and reassemble the shells, but there is only music, no verbal instructions. I ended up finding a few other videos from YouTubers that went into more detail. Overall, none of these issues are big enough for me to knock off any points, so I give it 5 stars and recommend it to anyone eh wants to refresh their Switch.
B**L
end result looks better than i expected!
a bit of a finicky job especially as someone who has extremely shaky hands all the time. but i love how everything came out in the end. very high quality and only had a few slip-ups that were just my own mistake when reassembling everything in my joycon again. nothing to even do with what i actually purchased just my own little mistakes lol. buttons feel good and so do the joycons themselves! definitely will be purchasing from again for more modifications to my other controllers and switch dock! if you’re not familiar with doing anything like this i 100% recommend using a tutorial to guide with you. even IF you think you know. it’s still best to have it there to give you a little helping hand. i personally didn’t use the guide provided with QR code i presume. but any guide is helpful either way. just find one that you like and get to work! it comes with spare screws. springs and a screwdriver! everything you need.
Trustpilot
3 days ago
4 days ago