
DOWNLOAD THE APP


Customer Services
Copyright © 2025 Desertcart Holdings Limited
DOWNLOAD THE APP
🤖 Elevate your DIY robotics game — build, code, and control like a pro!
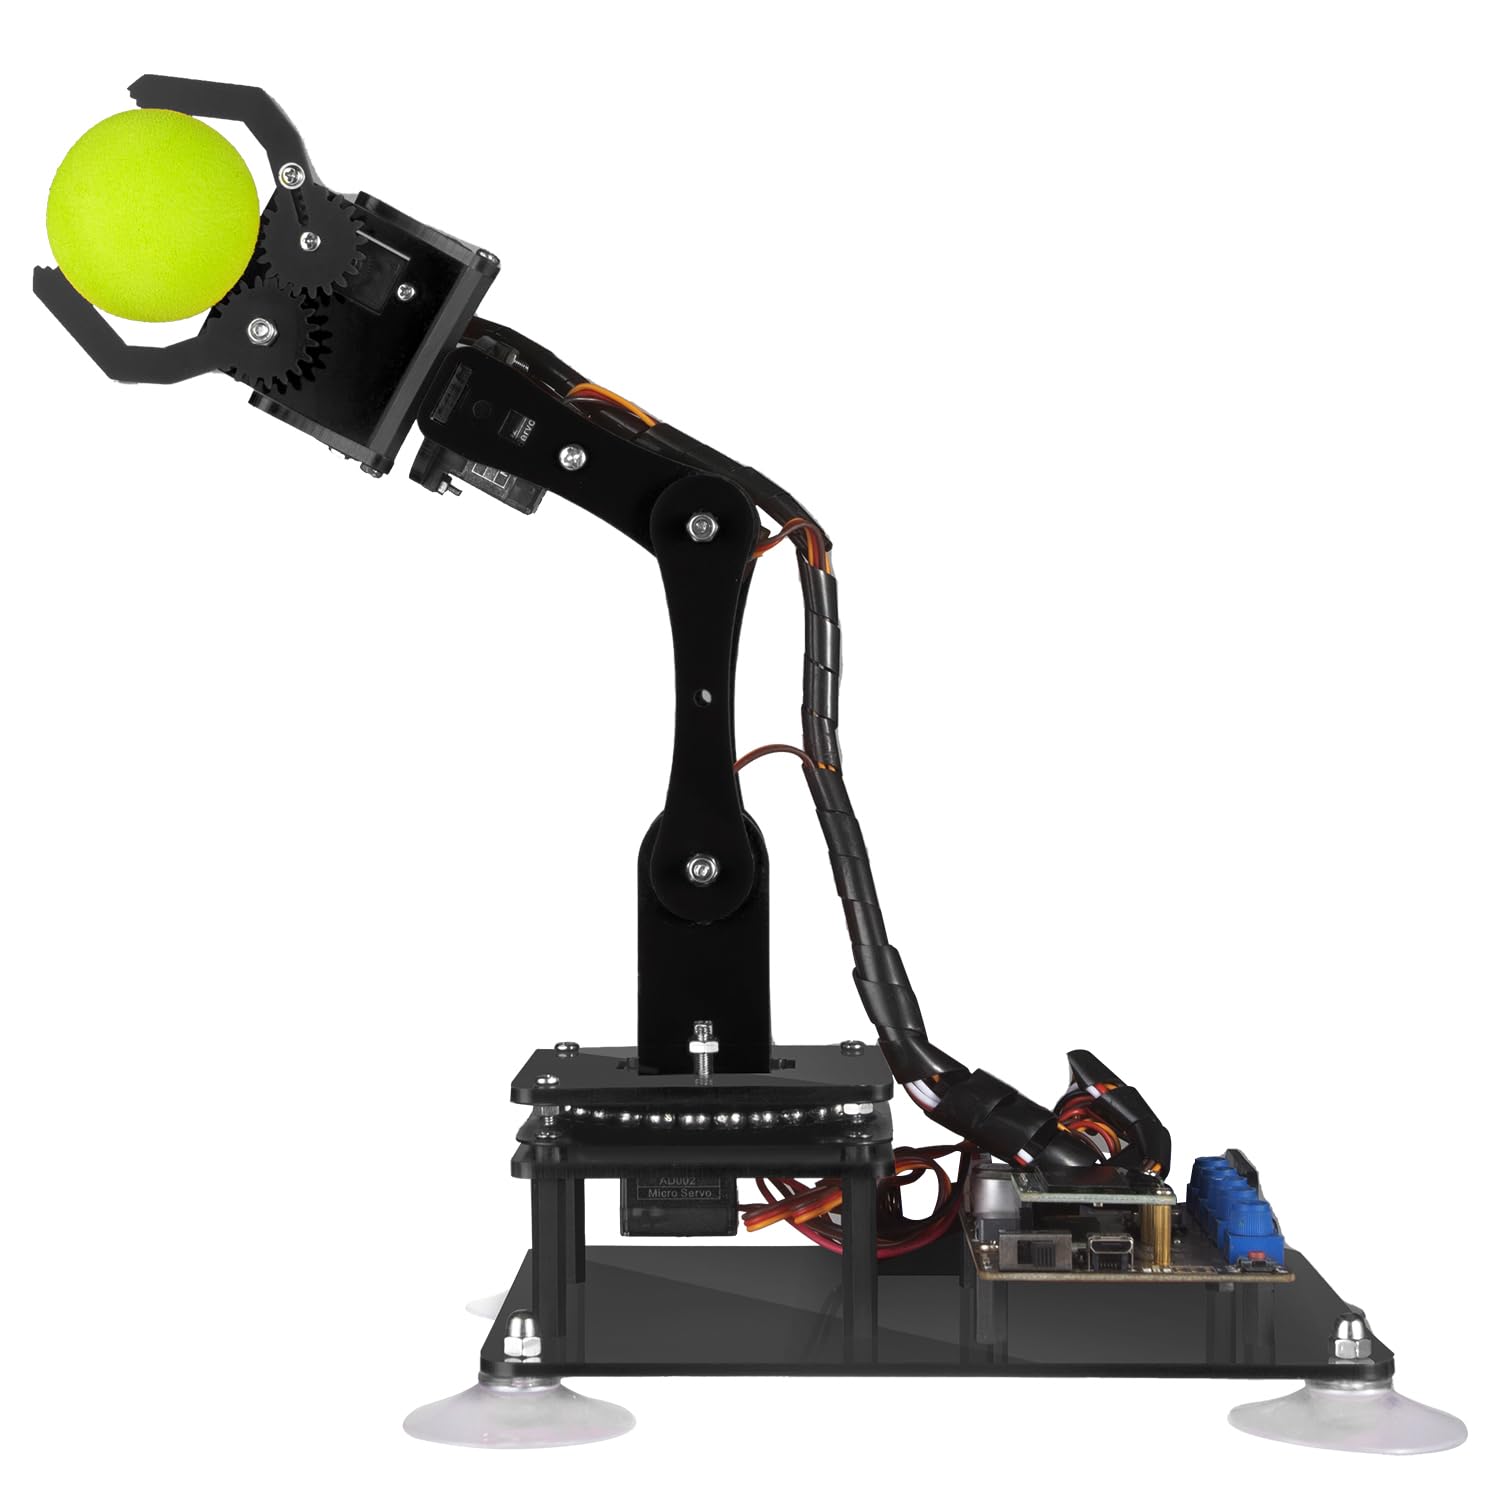
The Adeept 5-DOF Robot Arm Kit is a sophisticated DIY robotics project designed for enthusiasts and professionals alike. Featuring 5-axis servo control, full Arduino IDE compatibility, and a built-in OLED display, it offers versatile programming and control options including manual and PC-based interfaces. With comprehensive, regularly updated PDF tutorials and active technical support, this kit is a perfect gateway to mastering robotics, coding, and STEM skills. Batteries are not included, and assembly is required, making it ideal for those ready to dive deep into hands-on learning and innovation.


| ASIN | B087R8DLG6 |
| Assembly Required | Yes |
| Batteries Required? | No |
| Batteries included? | No |
| Best Sellers Rank | 75,287 in Toys & Games ( See Top 100 in Toys & Games ) 94 in Toy Robots |
| Colour | Black |
| Customer Reviews | 3.8 3.8 out of 5 stars (228) |
| Date First Available | 28 April 2020 |
| Educational Objective(s) | Creative Skills, Problem Solving Skills, Programming Skills, Spatial Awareness |
| Item model number | ADA031 |
| Language | English |
| Manufacturer recommended age | 16 years and up |
| Material Type(s) | Polycarbonate |
| Number of Game Players | 1 |
| Number of pieces | 1 |
| Product Dimensions | 22.35 x 16 x 5.84 cm; 680 g |
| tech_spec_battery_description_toys | Lithium-Ion |
R**N
Impressive instructions, straightforward to build, great fun overall!
Wow - this has been great fun to assemble! After reading the other comments I was a little sceptical, but the assembly instructions were really clear and the quality of the components exceeded expectations. First, the instructions come in a rar/zip, and the download is linked to on the box. The directory structure in the archive is a little chaotic! The assembly instructions in particular can be found in Tutorials-pdf/5. Assembly of the Robotic Arm.pdf, and it's a good idea by starting the base, and pausing after mounting the board. I say that because the servos needed to be primed to a 90 degree angle, which can be done by plugging them in to the board, and running the relevant script. The script simply angles the servos correctly, so that when you attach the rocker-arms etc then you are attaching them at the same angle as the instructions. It was straightforward enough (I'm a software consultant by trade with experience in electronics, but with patience and a little help I think a 14y would be able to manage). The engineering behind the arm is quite impressive. And building the arm was great fun. To be honest, I bought this for my six year old as a summer holiday project, but after looking through the instructions decided the build was too complex. However, he's already using Scratch Junior at school (a wysiwyg programming environment) so we're going to code the arm together using a similar approach. I'd say the main advice I'd give someone when following the instructions would be to trust the model diagrams over the physical diagrams. Each step has a few models and a few photos - I found the photos to be a little inaccurate (i.e. when determining the angles of the parts connecting to the rocker-arms, the models are correct, the photos not). Also worth noting that some of the scripts need libraries installing before they will build. Searching for the name of the header should fix this in most cases (e.g. for "#include <Adafruit_GFX.h>", go to Tools>Manage Libraries.. and search for search Adafruit_GFX, install the "Adafruit GFX Library" that show up and it should then work - do for each include that generates an error). Final tip - I found a torch on amazon that cost ten quid and came with 4 x 18650 batteries, so now I can work the arm without being connected to a computer via the potentiometers, and I can see where I'm going at night. I though this was a good price for four of the batteries, and they arrived next day.. No charger though, but I'll come to that when I come to that! All in all, very impressive, well worth the price for the joy it brought building and the possibilities that extending this will bring.. Might buy another in four years and see if my boy wants to build it with me :)
D**V
This is my first Arduino kit as the starter kit I ordered still has not arrived. While watching videos on what projects can be done on Arduino starter kit. Saw this product with next day delivery and bought it.. The Good: - A single Arduino Board which can control 6 servo motors, an OLED screen and power supply for the motors. There is a Bluetooth and Wifi option but not sure what is required to use those. - Tutorial pdf on how to control the board using Arduino IDE, Python and a few others tools but it is not detailed, just enough to demonstrate it can be done. - There are extra part for every screw, nut, or bolt for assembling the kit. - Although the Robot Arm and the Potentiometer on-board only have 5 Servo motors, it maybe possible to control a 6DOF Robot Arm via software coding. The Bad: - The arm is fragile and can break easily. Tiny screws and nuts and took 6 hours to build and another few more hours to adjust as I skipped some steps shown on the video. The motor should be 'primed?' before assembly to set to 'default' position. - The PDF or the Video may not match the kit, so I have to watch both side by side during assembly. - The 18650 battery maybe a problem to those who does not have it yet, not only you need to buy this battery, may also need a charger. - The CH340 chip has some extra steps every time Arduino IDE is launch as the driver seems to lock some Arduino files. - The finish product sketch for the kit is not available on-line. Once a tutorial sketch is uploaded, there is no way to restore the original sketch and must quickly learn programming to enable the features. Edit: The default sketch maybe is the Learning sketch available on the tutorial. - The Servo1 on the base under the ball bearing was difficult to secure with the servo screw as it is blocked by Servo2. At first, have to use Adeept extra screw which was longer and can secure it but later decided to remove the Servo 2 with the Arm and use the shorter servo screw for Servo1. Overall, this product is good enough to learn Arduino/Python programming for the servos and the OLED display. Not sure yet what can be done for the bluetooth and wifi options if it can be enabled.
T**R
Unfortunately, the device is very small compared to the description, and there is no opportunity for a return.
S**H
This is a great introduction to automation and robotics. This robot arm was easy to assemble and the instructions were very clear and detailed. It took me about 2 hours to assemble. If you’re into robotics and you’re looking to have some fun then this is the kit for you. It has a good amount of torque, the programming is really easy and allows for quick setup and run. Very good customer support.
M**Z
En general bien, lo malo fue que uno de los servomotores no funciona. ¿Cómo le hago para que me manden ese servo?
L**0
An excellent robot for beginners! This manipulator dives into a lot of challenges and opportunities in robotics—it’s definitely worth the investment, so much so that I bought two. If your child dreams of becoming a great engineer and building robots, try giving them this! They’ll either give up on robots and stop bugging you, or they might just become a robotics genius—either way, it’s a win! For anyone serious about understanding how robots are made and wanting a starter kit with nearly everything thought out for you, this is the best I’ve seen. You program it yourself, can hook it up to a Raspberry Pi, and it doesn’t need batteries. Just know the micro-motors get hot without load optimization or cooling, wires can get in the way, and there’s a port for Wi-Fi or Bluetooth (not included, just USB). There are a few downsides: a weak and small claw grip, imprecise motors with a minimum 10-degree turn, and 180-degree movement limits on all motors. This robot is an awesome first step into real robotics, or it might show you it’s not for you. If you’ve never programmed in Scratch or ChatGPT or done any model-building, it might be better to pick up some basics first, as this robot does require beginner-level coding and crafting skills.
Trustpilot
1 month ago
1 week ago