


"Dolle INSTA-RAIL Vertical Cable Railing Baluster Insert Kit - 36"H
Product ID: 35677547
| Manufacturer | Dolle |
| Part Number | 0184223 |
| Item Weight | 5.39 pounds |
| Package Dimensions | 36.69 x 2.72 x 1.18 inches |
| Item model number | 90636 |
| Is Discontinued By Manufacturer | No |
| Item Package Quantity | 1 |
| Batteries Included? | No |
| Batteries Required? | No |
K**H
Looks great and cost effective too!
Very impressed by this product. Installation was relatively easy - does require a bit more assistance when lining the top of the tubes to the pins. The quality of the product is fantastic. Have received a ton of compliments on it so far. Most importantly it passes code by replacing the cable with the steel tubes. Given all that is provided in the packaging, I feel the price point for the product is incredible. My only suggestion would be to remove the "cable" from the name of the product as there is no cable. Would highly recommend this product!
J**.
Looks Amazing But Be Aware of Installation Pitfalls
I installed 9 of the 42" and 2 of the 36" kits. I wanted to provide some real world feedback to potential buyers to make an informed buying decision since they are a significant investment. First off, the supplier tolerance requirement between the top and bottom rails is ridiculous. They are asking for like +/- 1/8" average. No wood railing system has that kind of tolerance. But, I understand why the supplier is asking for these tolerances now that I did the installation. It all comes down to desired tensioning. The cables actually have springs inside the end pieces that can maintain a very weak tension when the cables are tightened fully to the end. If you follow the install directions of 30.5 inches between top and bottom rail for the most part you will bottom out the end fittings. The cables are not really tight at this point but being held by the spring tension. In this situation you can pull the cables apart a good 2 or 3 inches at the middle depending on how much "slop" there is when the fittings are bottomed out. That is if you are lucky enough to actually have 30.5 inches between the top and bottom rail the entire length of the two sections (apprx 6ft). In my case, the bottom railings were slightly bowed up, so no matter what I did, the center cables were too loose. So I drilled a 1/4" hole through the bottom rail down through the decking and inserted a 8" galvanized carriage through the rail, reinforced the decking and pulled the bottom rail down to get the center cables tight. Basically making the top and bottom railings as parallel as possible which was no small feat. Too much tension and the top rail pulled down as well. Also, I went with 30 5/8" inches between the bottom and top rail. With this distance the cable end fitting do not bottom out and you can put decent tension on the cables that resulted in less than 1" bend in the middle.Some other tidbits for consideration.I used a 9/32" ignition wrench to tighten the fittings. It fit perfectly in the flats. I don't know why the supplier did not put flats on the cable receiver fittings. The instruction tell you to use needle nose pliers to hold them, that's a joke, they spin too easily. Flats on the male fitting would make the tightening a lot easier.I don't know what kind of stainless the phillips head screws are but you can count on rounding off about 1/2 of them while tightening. I tried several #2 drive bits with no difference. Not sure if there is a "metric" phillips head (these are imported parts) but I had to buy extra screws. Also about 10 of my male cable receiver fittings would not thread into the cable. It was the receiver fitting and not the cable fitting. I also had two cable ends pull off with hardly any tension. Also note that you are dealing with stainless hardware so be prepared to wipe out several hacksaw blades and drill bits. I used a sawzall to cut the mounting rails.But in spite of all the issues....I can say they really look fantastic!!! We wanted white railings and I decided that all those white balusters would wipe out our beautiful creek view. When I installed these, everyone has really complimented how "open" it looks now almost as if there were nothing there other than top and bottom railing. I would give a higher rating if not for the issues I mentioned above. The engineering concept is excellent but the execution leaves a lot to be desired. Knowing what I know after installation, I would still buy them because they are less expensive than horizontal and easier to install. The biggest thing one needs to be concerned about the parallelism of the top and bottom rails. Also, you better check how much "bend' the cables are allowed to have for your building code if the installation has to be inspected. With a 4" cable to cable centerline, there is no way you can create enough tension to keep a 4" object from passing between them.The stair installation was a lot more difficult that the main decking. I had to basically install the bottom rail as it "hung" from the top rail. It was really hard to maintain the exact top and bottom parallel at angle. I found it easier to just install new bottom rails and cut the ends to fit after the cables were positioned and held vertical while attached to the bottom rail fitting at both ends of the stair sections.All said, the look of our deck justified all the pitfalls and expense. It really has the "wow" factor now!!! Good luck!
D**K
comments, suggestions for using this product.
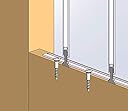
I purchased this product recently to build some railing around a window egress well. I've purchased this item as well as the longer 42" version (multiple kits). Overall, I like the product. It is as simple to install as suggested both visually and on youtube if you watch the manufacturer's video. Having said this I have a few comments and suggestions that one should probably bear in mind regarding this product before you buy it -or if you have purchased it and currently working with it and have some difficulties.1. the spacing between cable rails is 4" so this is standard -no issues.2. the 7 mm open ended wrench suggested by the manufacturer appears to be a bit too small. it is not 8 mm either. what i did was to file down the 7 mm wrench to make it fit the cable rail hardware. you will probably need to do the same. also i hacksawed the wrench to shorten its length. so regarding the other reviewer's comments -if you McGyver it -then no issue.3. when the manufacturer suggests a 30.5" spacing for the 42" cable kit and 24.5" for the 36" cable kit - i suggest that if you go 1/4" wider in each case as life will be easier for reasons that will become apparent below. also if you have existing deck railing -the vertical spacing must bet the stated lengths or this product will not work for you. i was building something from scratch so i could tailor the length to whatever i needed.4. next, be aware that in the kits that i received (both 42" and 36" versions) occasionally some of the provided screws have chips in the screw head preventing them from being used. not a biggie. additionally, watch for crossthreaded threads on the threaded studs. this is a rarity but i had 1 or 2 instances in 4 kits. finally, watch for incomplete threads in the barreled cable rail fitting. i had one instance where there was only 2 threads cut (someone in a hurry?). instead of going and re-tapping it i flipped out the cable for a spare cable since i had an extra kit. might be worth one's time to have an extra kit. basically, whoever the manufacturer is in europe (?) -the machining is a little on the messy side.5. finally, (and the most serious point of this post) the previous reviewer points out the biggest issue with this product. presumably, one wants the cables under tension when all is said and done -i'm not saying it is so tight as to be able to play guitar on them but they should probably be taut. however, the thread depth in the barreled cable rail fittings are a little variable. consequently, even if you have exactly 30.5 inches or 24.5 inches (as suggested by the manufacturer) or 1/4" more as i have suggested some cables will be slack (the extra 1/4" i am suggesting gives you a bigger margin of error). this is only because the thread depth in the cable rail fittings vary from rail to rail. again, this is a manufacturing issue. thus here is what i did (and what i am currently doing) to address the issue.a. make a chuck for the cable rail fitting. the diameter of that barrel is something like 0.32". drill a hole of that diameter in an aluminum block of an appropriate size. drill and tap the ends of it for 8-32. use 8-32 set screws to secure the barrel into this chuck and place the entire thing in a vise. you will want a chuck like this since tapping stainless by hand is going to be tough.b. next, you need a M6x1 bottoming tap. M6 is metric and the 1 indicates the pitch. bottoming means that it is not a gun tap and hence has a flat end. you want the bottoming tap to get as many additional threads as possible. you can buy such a tap off of a website like MSC Direct. I was unable to find such a tap at your usual hardware stores like Home Depot or Menards or Lowes. they only carry M6 gun taps.c. with the cable under tension (pulled tight using a second vise) start retapping the barrel fitting of interest. lube it with something like WD40 to make the tapping go easier. also blow the chips out with compressed air.d. repeat the retapping for the other sidee. once done repeat for all other cable rails. this is painful if you have a lot of rails.f. install the cable rails again -this time the barrel should screw in deeper onto the threaded stud. you should find that the tension on the cable has increased substantially to the point that it might meet your expectations. basically, if the manufacturer did deeper threads from the start there would be no issue -saving us a lot of work.g. one last suggestion to the manufacturer -if you provided flat edges to the neck of the threaded stud, this would enable one to efficiently tighten the cable rail barrel onto the threaded stud attached to the wood. right now one primarily relies on friction between the head of the stud and the wood to tighten things. if you could put a small wrench on the neck of the stud, then you could work along with the "7 mm" open wrench to tighten the cable rail securely.photos can be provided if needed.So to summarize --i like this product. it looks good and looks quite pro. installation is a breeze. the issue is when you want tension on the cable rails. this is probably the complaint from reviewer 1. i have suggested a DIY way to fix the issue above.
W**.
Bad Product!
This product it terrible!! the cables will not tighten up without stripping the cable clamps thus rendering the cable unusable.
M**N
They look great, but I would not recommend
I installed this product as my deck railing last year. I upgraded the deck railing without a permit, but this would have never passed inspection.The issues mentioned by dr_k in his/her review are spot on. I plan to try his/her suggestion of tapping out the barrels to see if I can get them tight.My experience was that about 25% of the cables are sufficiently tight.I have had 4 cables snap already also. I believe that even a small kid leaned on them hard they would possibly break.They look great, but I would not recommend.UPDATE 2019.04.30 I had to replace another 3 that snapped over the winter. See image.
T**Y
Wonderful view of our lake
Install is easy, but time consuming. Takes a lot to get all the cables tightened up. Kit does not come with a wrench so I had to make my own.These are awesome and allow us to enjoy the full beauty of our lake. Definitely recommend them if you want to see through your deck railing.
J**L
Great
Easy to install and look great.
Trustpilot
3 weeks ago
1 week ago