Desertcart purchases this item on your behalf and handles shipping, customs, and support to Netherlands.
✂️ Scan, cut, create—crafting just got smarter and sleeker!
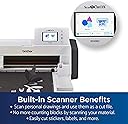
The Brother SDX85C ScanNCut is a professional-grade electronic cutting machine featuring a unique built-in scanner, 251 ready-to-use designs, and a 3.5" touchscreen for intuitive control. Its auto blade sensor technology automatically adjusts to material thickness up to 3mm, enabling precise cuts on diverse materials like vinyl, fabric, and balsa wood. Wireless and USB connectivity allow seamless design transfers, while compatibility with Brother sewing machines unlocks advanced crafting possibilities. Ideal for millennial professionals seeking a versatile, high-performance tool to elevate DIY projects and creative workflows.


| ASIN | B08HJNVY3P |
| Active Surface Area | 7 square inches |
| Best Sellers Rank | #71,324 in Arts, Crafts & Sewing ( See Top 100 in Arts, Crafts & Sewing ) #52 in Scrapbooking Die-Cut Machines |
| Brand | Brother |
| Brand Name | Brother |
| Color | Charcoal |
| Compatible Devices | Brother sewing machines |
| Customer Reviews | 4.4 out of 5 stars 1,661 Reviews |
| Included Components | 12x12” Std Tack Mat; Auto Blade&Holder; Spatula; Stylus; Accessory Bag; Guide |
| Input Voltage | 120 volts |
| Item Dimensions D x W x H | 11.8"D x 24.6"W x 11.3"H |
| Item Type Name | Brother ScanNCut SDX85C Electronic DIY Cutting Machine with Scanner, Make Vinyl Wall Art, Appliques, Homemade Cards and More with 251 Included Patterns |
| Item Weight | 16 ounces |
| Manufacturer | Brother International Corp |
| Material | Plastic |
| Material Type | Plastic |
| Model | SDX85C |
| Operation Mode | Automatic |
| Part Number | SDX85C |
| Print media | Unknown |
| Product Dimensions | 11.8"D x 24.6"W x 11.3"H |
| UPC | 012502663904 |
| Unit Count | 1 Count |
| Warranty Description | 1 Year Limited |
M**I
This unsung crafting hero is beyond amazing!
I have been looking at these for ages. I read blogs and reviews on Cricut vs Brother Scan and Cut and got Cricut Maker 3 for my first machine. It was AFTER that mistake that I realized that most of those are comparing OLD Scan and Cuts to the new Maker 3, which is beyond preposterous. It would be like comparing one of those old Expressions models to the newest Scan and Cut! In fact, the DX line came out in 2020 and Maker 3 came out in 2021, so there really isn't a legitimate reason for such a biased oversight, misleading people in a horrendous way. Anyway, I finally got one and it is amazing! I went ahead and got the Illustrator link so I can send my designs directly (seriously, directly) to the machine. Not only that, it cuts up to 3mm. Part of what you'll hear is that it's not as user friendly, people can't figure it out, but that's because it doesn't have the marketing some of the competitors do. There are plenty of very affordable and also plenty of FREE classes to teach you the machine. I haven't really taken mine yet as I use Illustrator mostly, with a little bit of Canvas Workspace. You CAN use this without a desktop, laptop, ipad or whatever but I would buy the cards with designs in them if you want to do that. All in all, this is a truly outstanding machine, don't let clever marketing fool you. Also, bad reviews are sometimes people truly not liking the machine and sometimes people expecting the crafting version of a dishwasher that magically finds, loads, and washes your dishes, then dries them and puts them away in the cabinet without you ever having to do much at all. Take a bit of effort, it's completely worth it!!!
T**Y
Brother SDX85C feels like the right choice
I have not owned a Brother machine of any kind in decades! My last was a typewriter that I really liked. Lol. I spent a vast amount of time searching for my first cutting machine. I didn't want anything that required a paid subscription, which eliminated the more well-known brand and I was fine with that. So when I first saw a YouTuber demonstrating this Brother ScanNCut SDX85C, I felt like this was the way to go. The scanning ability was the first thing to grab me because I like having versatility. So even though most of my projects will be uploaded to my cutter by way of a USB flash drive, I know that scanning will offer a great alternative for templated projects and patterned materials to be stored onto my flash drive, then uploaded to my Mac for use. I have not used my SDX85C heavily yet, as I am still selecting proper materials for my projects, but I did create the enclosed gift/treat box and it came out perfectly. The instructions were easy to follow, placing and removing the cardstock from the included mat went well too. Each cut was clean and precise. However, I did experiment a little bit by making a tree that I found in the Brother library. I only had a lighter-weight cardstock on-hand and the mat ended up being too sticky for it. So it was a chore removing every bit of the design and excess paper from it, but that was the chance I took. Now I know for that particular cardstock, I'll need to use a light tack mat or find another solution. But I don't blame the machine or the provided mat. My inexperience caused that inconvenience. Plus, the cardstock wasn't coated or textured like the enclosed sample, so surely, that had a lot to do with it. Using the display panel has been easy to understand. There are many shapes and project guides accessible through the touch screen and the Brother CanvasWorkspace. One YouTuber who does how-to videos for Brother cutting machines demonstrated that there are more design options when working through the offline version of the CanvasWorkspace as opposed to the online version. My intention from the very start was to only use the offline version, so I was happy to hear that. I have plans to use my machine for creating projects out of many different types of materials so having the auto-blade included is such a convenience. With a cutting depth of 3 mm, that will be sufficient for every type of material that I can think of, that I would want to cut with this machine. Anything else that is thicker that I care to work with, is generally much harder, so I'd use a laser cutter for such projects. I love that there are two compartments inside of the door where I can store the tools that I will use most often. I can even fit my 8" bookbinding bone folders in the left compartment, along with my rotary cutter and other smaller tools. The cutting surface is an ample and appropriate size for everything that I currently have in mind to cut. Be aware that at times, the cutting mat will shoot part way out the back of the machine to readjust the alignment for certain sections of your material. So be sure to have space to fully extend the rear tray about 3" and another 4-6" for the protrusion of the cutting mat beyond that. Overall the unit does have a large footprint so plan for that. As far as noise, I find it to be at a level that is not bothersome at all. I actually enjoy the sounds of my various machines working hard on my behalf so I may be partial. But the sound definitely isn't overbearing or likely to drown out conversations, TVs, etc. To date, the only complaint that I have is that the mats are quite pricey, especially when compared to other brands selling as multi-packs for the same price or less. I wish that Brother would have also included a light, heavy-duty, and fabric mat. Perhaps the higher priced models do or you'd have to catch a bundling deal, which I didn't. Other than that, I'm not a fan of hard-tipped styluses. I prefer the soft, rubbery tips. So I bought a set to replace the included stylus and purchased some additional hand tools as well. I know that once I really dive in, I'm going to be using my cutter on a daily basis. I'm already planning to get the adapters for foiling and freehand drawing/writing, and who knows what else is out there to expand its already great level of functionality! I'm looking forward to all that I will learn about my machine's capabilities after all this time of dreaming up ways that I'd like to use it, and the multitude of beautiful items that will be created. So far, I am very happy with choosing the Brother SDX85C, and knowing the expansive lengths that my designing mind will go, I'm really hoping that this machine can take me there every step of the way.
J**W
best craft shop upgrade
i was on the fence about which machine to purchase when it came to the cricut maker and the brother sdx. after so much research, going through pro’s and cons of both machines i really leaned towards the brother machine. both being costly i really wanted to make sure i was making a good investment for my business. I love that the brother scans your image and sends it right to your computer where you can see what you’re working with on your mat. I print messages in specific fonts for card fronts, place the printed image onto the card mat, scan it in to my computer, and that’s where i place cut files over top of the printed image to create the perfect greeting embellishments. this machine can do way more than just that as well. this machine works amazing for what i purchased it for and i do not regret it one bit.
A**I
Be patient it works
Take some time to figure out but the scan and cut feature is priceless. A little trouble removing adhesive vinyl with backing from the sticky mats as well as the residual. But there is an included spatula for the former and washing the mat can get the residue off.
W**Y
GREAT MACHINE (hard to learn) In Depth Review
I've had my machine for about 2 weeks now. I did a lot of research and watched a ton of YT videos BEFORE purchasing. I thought I'd be ready by the time I got it. Have read many many reviews and blogs too. Just so you know, until your hands on with the machine it's really hard to get it into your brain how it works and what it really can do. (At least my brain). I'm pretty tech savvy but even for me this is a very steep learning curve. There's things you need to understand 1. the machine interface - the options are willy nilly all over the place and so just memorize where things are because it's not intuitive at all and you'll poke endless times trying to find the option you need and go crazy. 2. You need to understand the mechanics, ie blade depth, cut pressure, speed and how to scan correctly, this takes trial and error and getting very familiar with the idiosyncracies of your particular machine. Because it's mechanical as well as electronic the settings for these things are going to be particular to your machine, the guidelines are your starting point and helpful but not the whole story. 4. You need to understand what exactly each option does and what it does not do. The manual isn't particularly helpful until you learn the lingo and exactly what you are looking for when you reference the manual, and it misses some details so you'll be searching for answers for sure. The error messages are opaque, just like on your computer but the manual addresses these. The machine does a fantastic job guiding you through some steps if it relates to actual cutting, say if you are foiling or embossing. Otherwise, your on your own. It won't let you cut it draw until you insert the right tool so that's nice for when you forget. (Brother has graciously unlocked those 2 features but you'll still need to purchase the supplies to use them, kind of spendy and embossing is a huge process to get through, I haven't even bothered to try this feature) 5. Sign up for, download and learn about Canvas Workspace. It also isn't very intuitive. The best YT videos on this are from Alanda Craft, Julie Fei Fan Balzer is good but she misses some essential details on the technical side of things related to this machine and it's software. Julie is great at demonstrating a project and you'll learn a lot from her. She goes fast though but her videos are short and so a rewind isn't a pain. There are lots of other scan and cut creators and all are helpful. 6. The Canvas Workspace has a ton of free projects and very nice ones too, also the brother USA site has lots and lots of free projects and even a very nice editing feature for many of them, these are all drawing files but you can import them to CWS as images and transform them into cutting files from there so if your looking for a nice card to tweak and personalize this is a great place. 7. Learn the difference between a draw file and a cut file. Your machine WILL NOT CUT a draw file and vice versa. So remember to save your file as either draw or cut if you don't want to be totally mystified as to why your final project isn't showing up on the cut/draw screen after you've imported it from CWS. 8. Use the Canvas Workspace as much as possible to create your file, the machine interface is really too small and limited for creating, it's great for on the fly though. It's REALLY EASY to send your file from CWS to your machine, I love this feature. 9. The mats are giving me no problem, I do a test cut first on new material and this saves the mat and my sanity. If a section loses it's stickiness totally I use the Zig glue to restick it and it works fantastic, see YT, I think Papered chef and Jen Blausey have really good videos. If I need more stick I just tape down the material, no big deal, just don't interfere with the rollers, you don't want to get your tape tangled up in the machine and mat registration marks have to be clear on order for the machine to read correctly. It's okay to tape over the rulers. I clean my mat with an alcohol free baby wipe. I really like my machine, I think it's very versatile and does a great job of cutting and drawing and I'm very excited about all of the possibilities a cutting machine offers and think I made the right choice to buy a Brother. I'm not a stamper and don't want to mess with dies or the expense of them. I called customer service yesterday with a question, got through in a reasonable amount of time and found CS to be friendly and responsive and very helpful. The scanning feature is wonderful so learn how to use it correctly, again a ton of videos on how to get the best results. I docked 1 star overall because this is a very intensive learning curve and I think Brother could do a better job with more detail in the manual. I printed out the manual and you need a printed manual for quick reference but this manual needs to be updated with the new updated features they've added since. Also I think a printed manual should be included because it's essential to have one, I didn't like at all having to print my own. I have 3 stars for ease of use but that's because of needing to learn so very much, 4 stars for the mat adhesion and 5 stars for versatility. As for my purchase experience, it was pretty rocky. The 1st machine I received had been used and the packaging was all messed up in the box and things were missing and the mat very used. So check your packaging very carefully and expect nothing less than brand new pristine. People return these things and the boxes are not always checked for damage or use. I was pretty mad because the delay put me way behind schedule and I was mortified at the condition of what I received, I'm not used to receiving things this way from Amazon, I use Amazon A LOT. The 2nd one I received is absolutely perfect and I'm very happy with Amazon's quick response in fixing it. I hope this review helps others, this is a great machine and they've even dropped the price 20.00 since I purchased it. The only drawback I can see is that we may not get all the updates going forward as they have newer (more expensive) models now and updates on older models are always eventually phased out so that's not a surprise. But it does all I need it to do but updates should factor into your decision on whether or not to purchase this model (CM350). If you go with a newer model my points still apply, I don't see any really difference in the newer models except higher scanning resolution, auto blade and increase of cut depth from 2mm to 3mm and quieter. All great new features but not a deal breaker for me. The new machines got the paper piercing and offset lines features added recently too, sad I didn't get those but I oh well. As for quietness, I don't find this machine to be noisy at all. Happy cutting! (You'll be walking around with tape on your feet a lot) 🤪
J**D
Is “life changing” too cheesy?
In May of last year I started a sticker business to pass the time during the stay at home order and it unexpectedly took off. I would spend hours cutting stickers by hand, and after much research between the Cricket and Silhouette Cameo 4 decided to get the Cameo on Black Friday (let me note that despite multiple searches for a scanner/cutter like this, this never showed up). Well, after a week of it failing to register & multiple phone calls to it support, it still wouldn’t work so I exchanged it for another one thinking that would help. Cut to three months later and hundreds of frustrated hours later and it still hadn’t cut a single sticker, even after buying a pixscan mat. This just happened to pop on my tik tok page of all places, and after some quick research the next day I took the Cameo back and ordered this. Within five minutes of getting it I had already cut the test pattern it came with, and was cutting stickers. My stickers are image based, and this reads it perfectly, and the .08 border seems to look best. There’s a few that have white spots towards the edge, so if upping the color reader to the max 20 doesn’t work (it rarely doesn’t) I just had to throw a quick 1 pixel border around them in photoshop, then set it cut -.05 inside said border and that also works great for keeping the white border look. Ive had this six days and basically cut my work time down by 80% and have cut thousands of stickers already. I did see some complaints about the standard adhesive mat it comes with being too sticky, but mine actually lost stickiness after a day, so now I use a tiny roll of masking tape on each corner then roll it down flat and its worked perfectly. The scanner glass is also very easy to clean if a stray piece of vinyl ends ip sticking to it after a complicated cut. There no wifi or software setup needed, which is also a great bonus as theres having to deal with registration marks. I can’t talk this up enough, and I wish I’d known about it months ago.
L**4
Super disappointed in it.
I've used numerous cutting machines, plotters, cnc lasers etc so I do have experience with machines that makes my job easier and ramp up production. This machine isn't it. I watched tons of videos on these before placing an order. Figured it'll be something easy enough for my kids to draw/print fun things and have the machine simply scan and cut. Turn out this doesn't nearly fit the bill. 1. Horrible software. The web app is very limited if you wanted to make your own custom cuts. If you wanted to use their selection of cut templates to make things then they do have lots to choose from. Their standalone app doesn't keep you logged in for longer than 14 days. Makes no sense why they'd make you constantly sign in when it's installed on your own PC. 2. It doesn't cut well. Half cuts for stickers were very inconsistent. It varies by brand of sticker paper, but with it supposedly auto measuring the source paper's thickness it should be fairly accurate across the board. I know it's not my machine because the test cuts when setting the machine up, it cut the supplies materials perfectly. Its advertised as being able to cleanly cut 100s of material and I guess it does, just know that every new type of material you buy, you're gonna have to do test cuts... Which brings us to the next thing. 3. It is extremely slow to operate. The cutting speed itself is decent. But scanning, editing cut lines, user interface etc is extremely slow. Just to zoom in on a design it's 1-3 seconds per tap. So if working on a small design and you need to zoom in 4 times that's 15 seconds just to do that not including panning in the direction you need to go to see the entire design. 4. The built in screen is horrible, and small. 5. The scanning feature is either way too sensitive or not sensitive enough. There's not nearly enough threshold adjustments. For instance on the same scan it would pick up light grey lines but will pick up specks of dust. 6. The cutting mat is way too sticky even after I wiped it down several times with alcohol. A few times where it finally made a good cut, material cut ripped trying to remove it. I will be keeping it because price-wise it's not a big hit for something that I will be using to continue to experiment with and push to its limits until it dies. But if you're into crafts and wanting a machine that is quick and easy to use I highly recommend sticking with a Cricut or Cameo etc. It sucks for what it's supposed to do, scan and cut.
R**R
The BEST
Best machine you can buy, especially if you’re a stamper. You’ll no longer need to purchase separate matching dies for your stamps, PLUS it can cut anything those “other machines” can. By not purchasing matching die sets for my stamps, this paid for itself! HIGHLY recommend ANY Brother SNC!
O**O
EL CUTTER DIGITAL
Excelente equipo, podría decir que es el mejor de su categoría (cortadores digitales de escritorio) por la integración del escaner, el plug-in con Adobe Illustrator, la interfaz del equipo es tan inteligente que funciona solo sin una computadora o móvil. Comparado a otros (Cameo) este equipo es intuitivo, preciso, conveniente, silencioso, escalable, multi-propósito, bello. Los creadores deberíamos dar Gracias Brother! por éste equipo. Neta.
D**L
machine sent was 100-120V only, not mentioned on listing.
Looked brilliant value for money, unfortunately listing did not specify the unit was 100-120V only, as this was lacking I expected the unit PSU to be dual voltage with a switchable supply (normal for electronic items) also the packing looked like it has done the rounds on some previous return as the actual machine supplied was a SDX125, and there were no accessories at all. Fair play to Amazon they provided a no quibble return, just waiting for the funds to turn up in my account. I'm sure the machine would have been wonderful as is the SDX1200 I went on to buy from Amazon locally supplied. (Although twice the price).
A**R
Great Cutting Machine
Once I figured out to activate and connect everything, it did exactly what I purchased it for. Cuts any design that I want. I found many images online and just sent them to the cutter and voila, perfect stencil every time! It's a little pricey for the machine and supplies, but just what I have been looking for!
H**R
Wish I had this sooner.
Very pleased with my purchase. Easy to use. This will be replacing my cricut explorer.
C**Z
Buen producto
Excelente producto, llegó rápido, igual a la imagen.
Trustpilot
2 weeks ago
1 month ago