Buy anything from 5,000+ international stores. One checkout price. No surprise fees. Join 2M+ shoppers on Desertcart.
Desertcart purchases this item on your behalf and handles shipping, customs, and support to Netherlands.
๐ Elevate Your 3D Printing Game with Silent Precision!
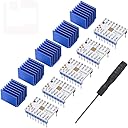
The DORHEA TMC2208 V1.2 Stepper Driver Module is designed for 3D printing enthusiasts seeking ultra-quiet operation and high performance. With a continuous drive current of 1.4A, peak current of 2A, and 256 subdivisions, this driver ensures smooth and precise control. Its compatibility with existing electronics makes it a cost-effective upgrade, while the included heat sink and screwdriver enhance user convenience.


| ASIN | B082LSQWZF |
| Best Sellers Rank | #144,230 in Industrial & Scientific ( See Top 100 in Industrial & Scientific ) #25 in 3D Printer Interface & Driver Modules |
| Brand | DORHEA |
| Brand Name | DORHEA |
| Color | TMC2208 |
| Customer Reviews | 4.6 out of 5 stars 393 Reviews |
| Item Dimensions L x W x H | 0.8"L x 0.57"W x 0.91"H |
| Item Weight | 0.05 Kilograms |
| Manufacturer | DORHEA |
| Material | TMC2208 V1.2 stepper driver module |
| Material Type | TMC2208 V1.2 stepper driver module |
| Model | D15796-1 |
| Part Number | D15796-1 |
| Product Dimensions | 0.8"L x 0.57"W x 0.91"H |
| Smart Home Compatibility | Not Smart Home Compatible |
| UPC | 701715433649 |
| Unit Count | 5.0 Count |
A**R
Awesome
Absolutely the best thing I did for my Anycubic i3 mega s printer. They work great and holy moly is it quiet.
T**.
Love these drivers!
Awesome upgrade! Was running Arduino/RAMPS1.4 with A4988s. Had unrelated issues but decided to change the drivers for TMC2208s. They were a drop in replacement (I use them in legacy mode) and are just fantastic! The noise level is just about zero. The only sound I hear when I print is the retraction and a bit of motor "grind" when the printer homes at the start of a print job. Can easily forget it is on! It is really THAT much quieter!. Note on setting the driver vref, I tried it the way the doc says and was not making any progress. Instead I followed the instructions on a youtube video and it worked great. Connect your volt-meter ground to the board wired ground to the power supply. Connect your positive probe to a small metal screw driver using an alligator clip. Watch the volt-meter readout as you turn the screw driver. Easy. Get the correct sized screw driver and verify it with the board powered off. Practice getting the screw driver onto the "pot" without touching anything else. Then power all. Connect volt-meter and adjust pots. I started with about 0.95 per and had to adjust from there over a few hours of practice prints. You don't mind if the stepper motors get warm but they should not be too hot to hold on to. If you go too low you will get skips so warm motor is OK. Have fun!
P**C
Awesome upgrade
I used to get the cheaper/older drivers that worked until I needed some more power. That's where these upgraded chips came in. Thank goodness they are around, and they aren't much more expensive especially in bulk. Just buy a bunch of these instead and your steppers will be silent... which I prefer to the techno buzzing symphony ambiance my projects usually have haha. Wish I bought a bunch of these chips way earlier
D**A
Great price and customer service, but the TMC2209 may be a better option for you.
They work very well, I had one of them arrive damaged due to shipping, and recieved a very quick resolution from the seller! overall great purchase for the price. The one recommendation however is to look into the TMC2209 which is only a few dollars more expensive, but provides more features.
R**N
Amazingly Quiet!
I upgraded my DIY motorized blinds from DRV8825 to the TMC2208 and I am amazed at how much quieter these are than the DRV's. I mean, it is night and day. And they are almost 100% pin compatible. There is no sleep or reset pin on these but the step, direction, enable, microstep, motor,and voltage pins are all the same. One limitation though, the only way to go into full-step mode is to use them in UART, which I didn't want to go to the trouble to do so I am running them in half-step mode and they are still just as quiet. Just apply your VCC to the MS1 pin to get the 1/2 step setup. Also, they probably wouldn't have been a problem but it appeared to me that the solder joints on the top of the pins got too close to the heatsink for my comfort. So I trimmed them with my micro-cutters before applying the heat-sink to give extra clearance, just in case. And you will need the heatsinks. These do get much hotter than the DRV's.
M**S
Problem free drivers
Works great on a MKS gen L board running Marlin 2.x.x. These are setup as standalone drivers out of the box. Make sure to disconnect steppers, power up board and tune voltage first. Pots were decent, a little overshoot when adjusting so go slowly. Would buy these again.
L**.
My printer is so quiet now!
This made my 3D printer so quiet now! Drop in replacement, but I did have to switch the stepper wires around because all motors ended up spinning the wrong way. Not the fault of the stepper driver though it just outputs in a different direction than the drivers I had previously.
C**N
Soooo quiet!!!
I have to say, WOW what a difference these were! My printer no longer sounds like a 56k modem while it's printing! In fact, I am constantly having to look up to see if it's even printing still because I can't even hear it. Print quality went up quite a bit too, but I also flashed the newest marlin at the same time so that probably had some effect on that. Quick and easy to install. I just flashed an updated firmware for my anycubic so I didn't have to reverse my connectors. TIP: when setting your reference voltage, touch one of your probe's to your screwdriver and the other to the test hole furthest from the adjuster screw. This will allow you to see the voltage as you adjust it!
R**L
Works perfectly!
Package arrived in a timely manner and was exactly as described. The TMC2208 stepper motor driver is the quietest and most reliable way to drive stepper motors, IMHO, and I appreciate the inclusion of the small screwdriver to adjust the onboard potentiometer to set the limiting current (Iโm not using these in a 3D printer so I donโt require the included heat sink, but most others will). Note that is is version 1.2 of the board design which means Vref is the top left hole next to the EN pin (on v2 boards itโs the middle hole in the group of three).
Trustpilot
2 months ago
2 weeks ago