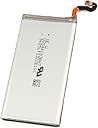
๐ง Revive Your Galaxy S8+ with Confidence!
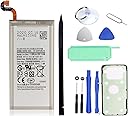
The HDCKUGalaxy S8 Plus Battery Replacement Kit offers a brand new, high-quality 3500mAh lithium-ion battery designed specifically for the Samsung Galaxy S8 Plus. With safety certifications and a built-in microchip to prevent common battery issues, this kit ensures reliable performance and longevity. Ideal for users seeking to enhance their device's battery life, it comes with easy installation instructions and dedicated customer support.


| ASIN | B07VH9KCYM |
| Amperage | 3.85 A |
| Antenna Location | Phone |
| Battery Capacity | 3500 milliamp_hours |
| Battery Cell Composition | Lithium Ion |
| Battery Cell Type | Lithium Ion |
| Battery Weight | 40 g |
| Best Sellers Rank | #313,304 in Cell Phones & Accessories ( See Top 100 in Cell Phones & Accessories ) #3,432 in Cell Phone Replacement Batteries |
| Brand | HDCKU |
| Compatible Phone Models | For Samsung Galaxy S8 Plus |
| Customer Reviews | 4.2 out of 5 stars 854 Reviews |
| Item Weight | 0.04 kg |
| Manufacturer | Dongguan XiRi Electronic co.,LTD |
| Model Name | galaxy,galaxy s8,galaxy s8+,s8 |
| Model Number | EB-BG955ABE |
| Number of Batteries | 1 Lithium Ion batteries required. (included) |
| Recommended Uses For Product | Phone |
| Reusability | Rechargeable |
| UPC | 639510254940 |
| Unit Count | 1 Count |
| Voltage | 3.85 volts |
S**6
This was super quick, easy, and inexpensive to do it yourself!
This is the 2nd time I have replaced the Battery for my Samsung S8 plus. The 1st time was 2.5 yr ago by a local Cell repair shop that charged me $65 for Battery and labor, which took 4 days. When I went back to them this 2nd time the cost to replace it was now $95, so I said I needed to think about maybe just getting a new phone. I then checked Amazon for the cost of a replacement Battery which was surprisingly only $16.99 so I decided to do it myself. After placing the order for the Battery I went online to YouTube to view the videos for replacing the S8 plus Battery, which there were many. My favorite was by Nicolay Tanev (11 min), who uses similar tools that comes with the replacement kit. When the Battery arrived 2 days later it was the correct replacement Battery for my S8 plus model phone: 3500 mAh. The replacement was quick and easy after having viewed the video several times already: 25 min to remove the back cover with a heat gun, remove the screws, the old Battery, and then insert the new one. I used a magnetic tip screwdriver of my own, that speeds up removal and reinsertion. But the Kit does come with the proper size screwdriver, prying tools, and also included new adhesive for the back cover. My suggestion for the fingerprint sensor that is attached to the back cover when you first remove the back is to remove the sensor from the back cover and place it into the slot in the phone & attach the connector, instead of leaving it on the back cover. That way you don't have to worry about reconnecting the sensor before adhering the back cover because it will already be in there and connected! Just make sure when placing the back cover down over the phone that you line up the fingerprint sensor with the cutout in the back cover. The only small problem I ran into was the new adhesive for the back cover. It is attached to a doublesided plastic sheet that I had to remove the top layer of plastic, place it adhesive face down on the back cover, use the heat gun to get the new adhesive to transfer, then allow it a minute or so to cool before removing the plastic sheet and placing the back cover over the phone again. But BEFORE securing the back cover, it is best to do a simple test first, to make sure that everything works properly before you apply the final adhesive sheet to the back cover. To begin the test, re-Insert the sim tray, Antenna & all layers that were removed, line up the back cover with the fingerprint sensor and close it up without reinserting any of the screws yet. Power up the phone, verify that the fingerprint sensor is working properly and that it is receiving calls and connecting to the Internet, and take a snapshot of something using the camera flash. If all of that is working fine then you know that you have done a good job. Now you are ready to power it off again and remove the back cover. Apply everything back in reverse order that was removed, along with the screws to secure them in place. Finally, apply the new adhesive sheet to the back cover using the heat gun to get it to transfer from the sheet to the back cover. Allow it to cool for a min before removing the 2nd sheet of plastic. If by chance the adhesive does not completely transfer to the back cover cleanly apply the heat gun again to any stubborn area until it all transfers and lifts off cleanly. Finally replace the back cover over the phone, pressing firmly on all sides. I also went around the outer edges of the phone with the heat gun to lock down the back cover permanently, and allowed it to cool for a min before starting it up again. This is important if you want the phone to be waterproof again. Prior to installing the new Battery, the old Battery had overheated and caused the phone to buldge open, breaking the seal of the back cover on 3 sides. Now with the replacement Battery installed, the back cover seats firmly & cleanly on all 4 sides again. Voila! So far I have only recharged the Battery 3x since installing the new one. Each time waiting for it to discharge to 6% or less before charging it again. The Battery life is wonderful, lasting at least 2 days before reaching 6%, and I use this phone daily as my secondary phone to act as a Hotspot for my T4 Tablet & primary S20 phone. So it gets used alot! In other words the replacement Battery was definitely a good one, imo, and not some cheap inferior knockoff. The kit suggests that you wait at least 3x to 5x draining & recharging before resuming your regular recharging cycle, whatever your normal may be for you. I'm very pleased with this product, and I'm letting everyone know how easy, timesaving, and cheap it is to do it yourself! What a pleasure to feel confident that I did it myself! I would highly recommend this product to anyone thinking of replacing their Samsung Battery!
R**T
Look no more. This is a complete Kit
Look no more if you need to replace the battery in your Samsung Galaxy S8 Plus. This kit is all you need to accomplish this task. I am currently using a Pixel 4 XL as my daily driver. The S8 Plus is a backup phone for travel. So, it was placed in a drawer. A few months ago, I noticed the back was budging out but I left it alone. I was planning to take it to Best Buy and have Geek Squad to replace it. I sent an email to Best Buy but never did receive a reply. Since I have replaced phone batteries before, I decided to do it myself. Removing the back on my S8 Plus was easy as the glass back was already lifted up. I use my hair dryer and heated up the back slightly. I remove the back with the provided Nylon Plastic Spudger tool without any issue. The fifteen screws came out easily. The screw driver provided works but I used my own screw driver with magnetic tip. The Black Plastic covering the upper part of the phone and battery lifted out easily. (Note: - It is not necessary to remove all 15 screws. I later noticed that the bottom 4 screws could have been left alone.) Prying the battery out is a little challenge but I got it out with by heated it up very slightly with the hair dryer. Putting the new battery in was easy. It fits just fine. Installing the black plastic cover and the screws was not a challenge. Replacing the Glass back took a little more time. The adhesive left on the glass back needs to be removed. I use the hair dryer again to heat the back. The adhesive could then be peeled off. I managed to remove most of the adhesive on the back. There were still some on the edges on the phone but I left them alone. Replacing the Glass back is a challenge as my fingers are not tiny. I need to rig a flash light to lit the inside to clip on the connector for the finger reader. I was able to use the Spudger to snap the connector on. Just make sure that the back is lined up with the phone when you are putting it back as the adhesive would not allow you to slide or adjust the glass back. After, replacing the back, I use my hair dryer to heat up the back slightly and applied pressure on the edges to โsealโ the back. The result is not bad and I am happy with this kit. I am draining the battery after charging it to 100% to condition it. The battery seems to be working fine as it is holding a charge and draining very slowly. So far so good. I do not expect any issue with this battery. Update: - After a few days, I am happy to report this new battery works great. I did fully charge the battery and let it ran down couple of times to prep it. Since this is a spare phone, I have a foreign SIM in it. It is not my regular phone. I just use it at home on WIFI and check my email and stocks info from time to time. I am getting more than 2 daysโ worth of run time before charging. Update 2:- While this S8+ is not my daily driver. I do turn it on at home and check emails from time to time. I included my battery status screen shots. Now, my S8+ could last over 3 days in standby easily. When I do use it for travel I expect the battery to perform fine.
Z**H
My review doesn't really matter
Update: after a year it finally started expanding, which I figured would happen being it's on a wireless charger 24/7. Went with a different brand this time. I still mostly stand by my original review just because I didn't use the battery like most would I use my old S8+ as a monitor for my cameras, so it's always on and sitting on a wireless charger. One day I picked it up and noticed a big bulge on the back, which I immediately knew was a spicy pillow so I got on here and started looking up cheap replacements. Few things I can't comment on, like battery life or ease of putting it back together. Since the original battery started to expand it ended up pushing a good portion of the back glass out which made removing the old battery very easy. I didn't put much effort into replacing the back panel very well but it stays together which is all I needed. The tools were a nice inclusion even though I already had them from other tool kits. Since I don't use it as most would I'd say my review mostly doesn't apply and my recommendation is meaningless, but it still worked.
M**S
Some tips on installation
So far so good. I purchased this version as opposed to one marketed as higher battery life in hopes that matching the original mAh (which is admittedly on the low side, at least by today's standards) would provide a better chance of it working well with fast charge and avoid overheating (which we have noted with the S8+ when in a case). Is that valid logic? I don't really know, but I have seen other negative reviews re aftermarket batteries and fast charging. Here are some tips that you might find useful... Definitely watch a video first, but take some things with a grain of salt. Videos are undoubtedly produced on a unit that was previously disassembled. Your disassembly will be tougher, so go slow. For removal of the back, definitely use a heat gun and work in small sections. I found the flat end of the long plastic spudger to be much more effective (and safer) than the metal one. But BEWARE. The glue above the camera extends much deeper than the glue around the rest of the edges. Had I looked carefully at one of the videos, I would have seen that even though they don't point it out. This is the section I worked on last. Not realizing the glue went deeper, and probably being over confident with how the rest went, I got a little too aggressive in lifting that edge. That's when I cracked the back. Oh well, this repair will now cost 45% of a professional cost rather than 25%. Learn from my mistake. Apply heat just a little further in on that side, and don't act like a monkey. Although the instructions here don't say to do so, there is a good online video that shows removal of the lower antenna assembly. I found that to be much more dicey than the upper antenna assembly and skipped it (note the circuits next to one edge). It's not necessary as long as you are careful not to pry against it when removing the battery. Expect the battery removal to be the toughest and most frustrating step. FGS don't heat a lithium battery. I used the long spudger to lift the outer edge just enough to insert a playing card. I found it more effective to NOT fold the playing card over as suggested in a video. I tried to work mostly from the outside edge and much more gently along the inside edges. Go slow. Slowly slowly catch the monkey. When replacing the upper antenna assembly, note that there are tiny clips around the edge that need to snap in to the edge of the case. They're easy to miss and I don't think you want that assembly sticking up in those spots. They're not hard to push in, but again, don't act like a monkey. One other tip from experience with other disassembles. When tiny screws won't lift out because no matter how many times you turn there is a tiny edge of the threads that still grab, FGS don't try to turn the unit over and shake them out. That's a recipe for a lost screw. Gently push against one edge with a curved spudger while unscrewing. Your goal is NOT to flip it out, but to get it to lean over at the end. Then you can remove it. I find a small magnet, or better yet, a magnetized screw driver, to be helpful. Note that you can usually get enough magnetization out of a metal screwdriver by running it several times in one direction over a magnet. Good luck.
C**H
Super easy to install and seems to work great
My Galaxy S8+ had the back cover nearly falling off because the battery had bloated and pushed the back up off it's base over time. Diagnosing a bad battery was not tough as it wouldn't take a change and the back was falling off. I ordered this kit online and it was delivered within two day. Installation was super easy and the adhesive strip installed easy as well and holds the back cover on nicely. Very good value for the $$. I recommend to anyone needing to rejuvenate their old Samsung S8+ with a new battery. Note: Cardboard box with tools in it is from a different repair set. Picture with bloated battery in my hand shows the kit I received with the replacement battery.
B**A
Works great but get a new back UPDATE
UPDATE: Battery worked fine for a month. Today, my phone drained super fast (from 100% to 0% in an hour or so) and now it won't charge or turn on. Cheap battery, don't bother. Like other reviews said, you should probably buy a new back for your phone, too, since it's almost impossible to remove without breaking the glass. Maybe if the kit included a few more picks it might work better to not break the glass. Also the ring on the suction cup is a little flimsy so I just replaced it with a standard key-ring to beef it up. Otherwise, this was the perfect solution to a dead S8+. Battery life is a little weird the first few charges, but just do as the instructions say (discharge to <10% and charge to 100% and leave plugged in for a half hour after, repeat 2-5 times), and your phone will be as good as new. Just buy a new back. Get a new color. Treat yo self.
G**N
A difficult task. Not impressed by battery performance.
Replaced the battery and it was a huge pain. I consider myself a techie, and have done electronics repairs before. Samsung does not want you to get into the battery compartment, mostly because of waterproofing. Unless you've done this several times before, you have a 99% chance of breaking the back glass, even if you're heating the adhesive sufficiently and following instructions. I recommend buying a back-glass and fingerprint reader along with this to avoid wasted layover/shipping time. Yes, I cracked my back glass. Since the fingerprint reader is attached to the back glass, you will probably be needing that too. It is possible to remove the old fingerprint reader from the old glass, but I didn't. My phone's original battery was performing badly; this is why I wanted to swap it out. However, I'm not impressed with the performance of this battery. The price is great, but it's not an amazing improvement.
M**Y
Slow and Careful Keeps the Phone Intact
Purchased 12/5/19 installed 12/07/19. Here's the run down. If you have absolutely no patience, installing a battery on any new phones is not for you. Why? Because all new phones have a strong adhesive that will need to be soften by a heat gun or a hair dryer in order to SLOWLY and CAREFULLY pry open the back of the phone. You need to be strategic in where to place your playing cards so the adhesive doesnt stick back on the phone. Not only after you finally pry open the sides of your phone, you HAVE To be careful not to break the fingerprint cable b/c it is attached and you will need to pry it off first. PLUS the wireless charging panel is adhesived to the back cover as well so be careful not to ruin that too. Everything after that is pretty easy so if you've gotten that far without breaking anything you should be in the clear. As for battery life for the s8+ we will have to wait and see after a couple days or weeks. Will update then.
Trustpilot
1 day ago
1 month ago